|
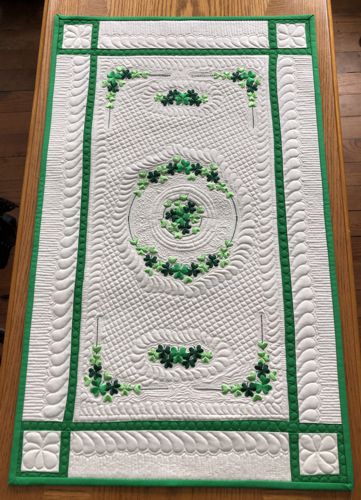
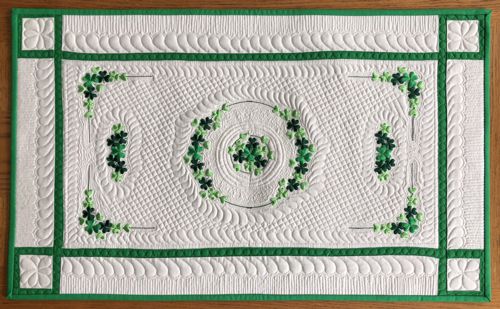
This tutorial walks you through making a quilted table runner with a shamrock wreath embroidery design. You will learn how to sew the fabric pieces, add machine embroidery, and quilt the layers together. Perfect for St. Patrick's Day!. We used the designs from the Shamrock Border Set.
The finished size of the quilt is about 17 1/2" x 29". |
|
You will need :
- embroidery threads either polyester or rayon;
- about 1 yard of light-colored solid fabric for the central part and borders;
- about 1/3 yard of green fabric for the borders and binding;
- light-weight cut-away embroidery stabilizer;
- backing and batting;
- quilter's ruler;
- rotary cutter;
- iron;
- colored chalk pencil or disappearing fabric marker;
- #12 universal needle;
- quilting threads of matching colors;
- #12-#14 quilting needle;
- printer (optional).
|
Cutting:
|
Out of the light-colored fabric, cut
- a piece measuring 12 1/2" x 24 1/2" for the central part;
- 2 strips measuring 3" x 24 1/2";
- 2 strips measuring 3" x 12 1/2" and
- 4 squares measuring 2 1/2" x 2 1/2".
|
Out of the green fabric, cut
- 2 strips measuring 1" x 24 1/2";
- 2 strips measuring 1" x 12 1/2";
- 4 strips measuring 1" x 4";
- 8 strips measuring 1" x 3".
Use the remaining fabric for the binding. |
Assembly:
|
| Note: seam allowance is 1/4" if otherwise recommended, press the seam immediately after you make it. |
Sew the 2 green 1" x 24 1/2" strips to the long edges of the central part.
Then sew the light-colored 3" x 24 1/2" strips to the green strips.
|
|
| Sew the 1" x 12 1/2" green strips to the long edge of the light-colored 3" x 12 1/2" strips. |

|
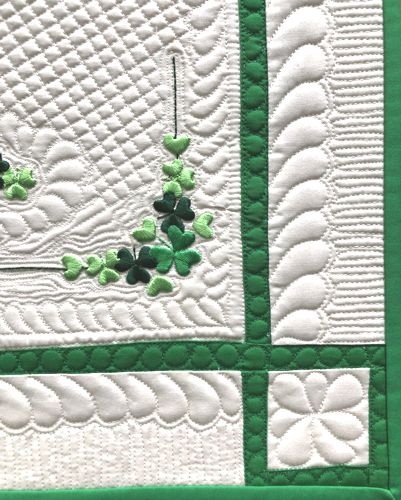
| Corner Blocks: |
| Corner blocks are assembled as log cabin blocks. |
| Sew the 1" x 2 1/2" green strip to one of the edges of the 2 1/2" x 2 1/2" square. |

|
| Sew the 1" x 3" green strip to an adjacent edge of the square. |

|
| Sew another 1" x 3" green strip to the next adjacent edge of the square. |

|
| Sew the 1" x 4" green strip to the remaining edge of the square. |

|
| Make 4 blocks. |
| Sew the blocks to the short ends of the 12" light-and-green strips. |

|
| Sew these strips to the short edges of the central part. |

|
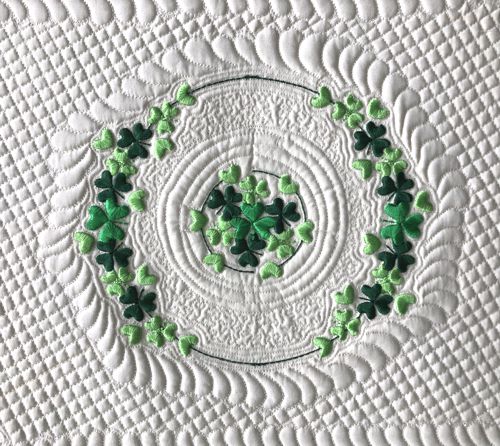
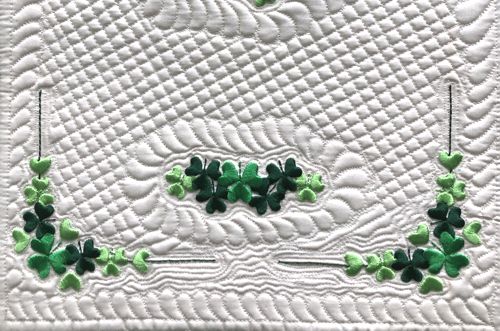
| Embroidery |
Select the designs from the Shamrock Border Set and upload the files to the embroidery machine.
Select threads.
It's very important to position the designs correctly on the working piece.
If you have a printer and embroidery software, print-outs of the designs can be helpful.
If you do not, you can cut out rectangles of the same size as the designs and arrange them on the fabric to determine the position of the embroidery.
Mark the position and the center of each design with the chalk or disappearing fabric marker.
Stabilize the chosen area. When hooping, use the transparent plastic hoop templates (they come with the machine), they will help to see the center and position of the designs. Hoop the fabric tightly and embroider the designs one by one.
Remove the excess stabilizer.
|
Quilting and Finishing
|
Now place the backing on a flat surface (table) face down. Cover with batting. Spread your working piece over it.
Pin all layers together.
We quilted in a free-motion style all over the working piece. Start from the central part, and echo-quilt the emboidery first.
If you are a beginner, choose simpler motifs. You can also draw the motifs with chalk pencils, but be sure that it can be easily removed without staining the fabric. |
|
|
Press with heavy steam. Square the piece - all corners should be 90 degrees and opposite sides of the same length.
Finish the raw edges with the binding. |
|
| Have fun! |
|
|
|
Back to Shamrock Border Set
|
Back to Projects Page
|