|
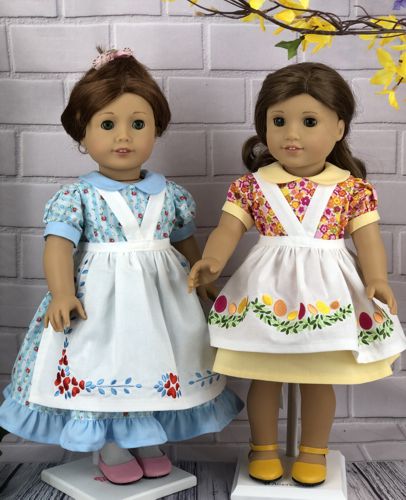
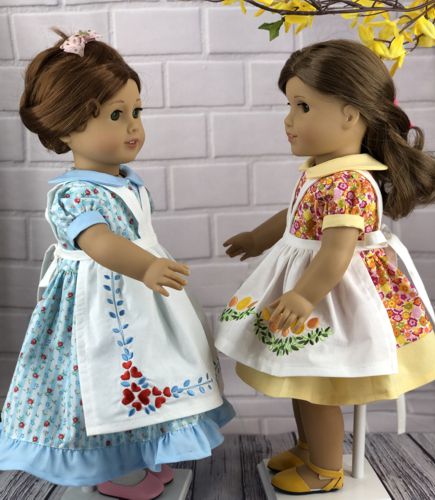
Make a charming apron for your 18-inch doll with this simple sewing and embroidery tutorial. This project includes two apron designs—one with Easter-themed embroidery and another with floral borders. You will learn how to sew the apron, add straps, and embellish it with machine embroidery. These aprons are a fun way to personalize your doll’s outfit for different seasons and occasions. These aprons are designed to fit 18-inch dolls, such as American Girl, Our Generation, My Life As and similar dolls.
We used embroidery designs from the Easter Garland Set and Heart and Vines Border Set.
|
|
For each apron you will need :
- embroidery thread, either polyester or rayon, (you choose the color);
- about 1/3 yard of solid-colored light-weight fabric, such as light-weight cotton, or cotton-polyester blend;
- light-weight cut-away embroidery stabilizer;
- chalk or graph pencil;
- quilter's ruler;
- rotary cutter or scissors,
- sewing pins;
- iron;
- #12 universal needle and sewing threads.
|
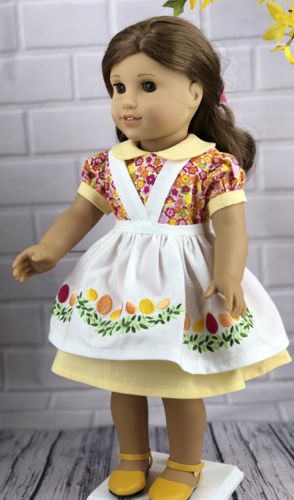
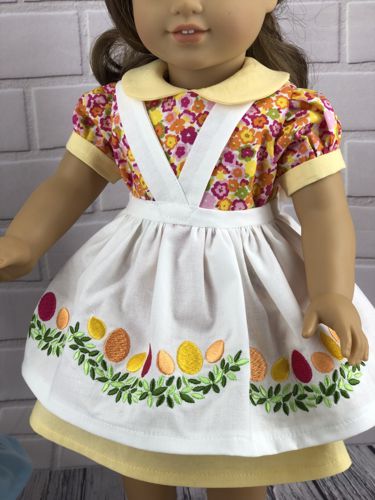
This Easter-themed apron features the designs from the Easter Garland Set .
|
|
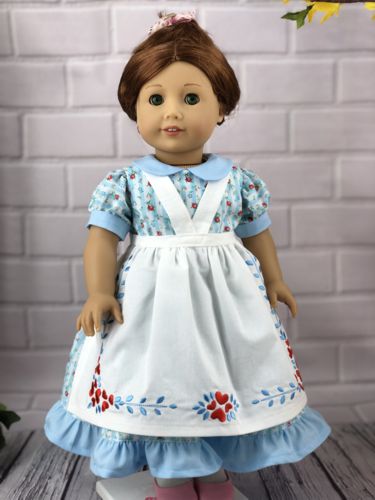
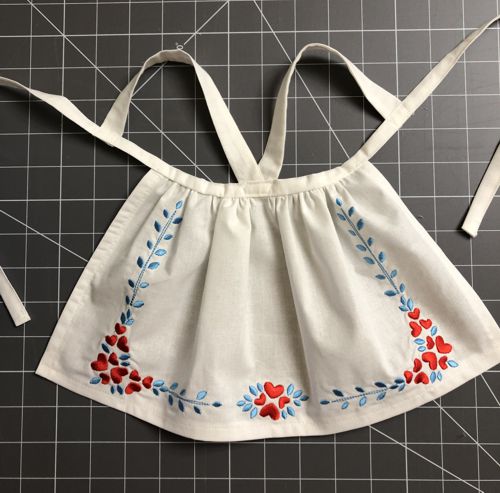
The apron below features the designs from the Heart and Vines Border Set.
|
|
The aprons are sewn in the same way.
|
Embroidery:
|
Decide which apron you'd like to make. Upload the files from either the Easter Garland Set or from the Heart and Vines Border Set.
Prepare the fabric and the stabilizer, hoop them tightly and embroider the design of your choice.
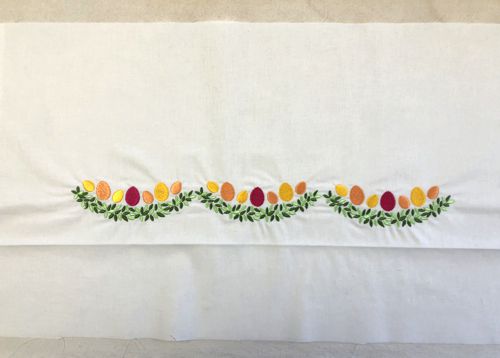
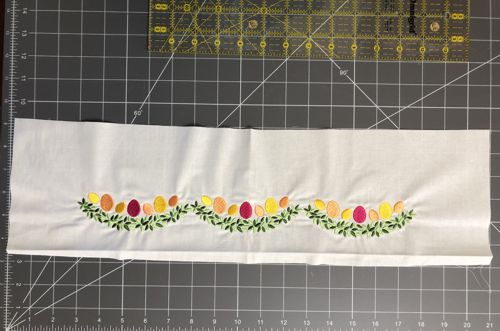
For the Easter-themed apron we embroidered one design 3 times.
|
|
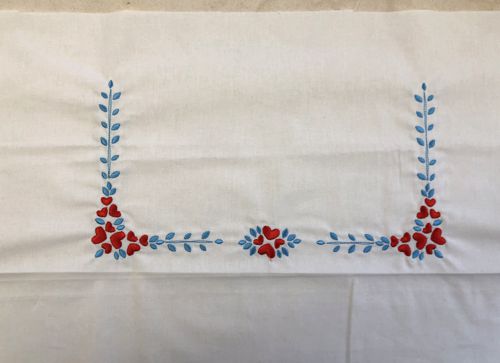
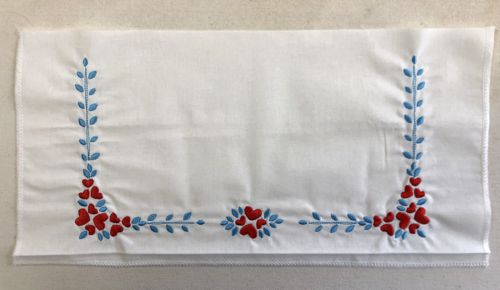
| For the second apron we stitched mirror images of the corner designs and one small design in the center. These designs are from the Heart and Vines Border Set . |
|
Cut-away the excess stabilizer around the embroidery.
Please note that you can make the aprons of any length and fullness.
The Easter-themed apron is shorter and fuller, we trimmed the stitch-out to 5 1/2" x 21".
|
|
The second apron is longer. We trimed the stitch out to 8" x 15 1/2".
Finish the hem and the short sides with zig-zag or serger. |
|
Fold the short sides 1/4" back, press, topstitch.
Fold the hem 1/2" back, press, topstitch.
Stitch 2 rows of gathering lines along the upper edge of the working piece.
|
For each apron, cut out 1 strip measuring 1 1/2" x 36" for the belt and 1 strip measuring 2" x 17" for the straps.
|
Fold the strip for the belt lenghwise in half, wrong side inside, and press. Fold one of the long edges 1/4" to the wrong side and press.
|
Mark the center of the belt on the unfinished long edge with a pencil. Measure 3 1/2" on both sides of the pencil mark and mark each measurements with a pin.
On the upper edge of the apron, mark the center.
Aligh the center marks of the belt and the apron.
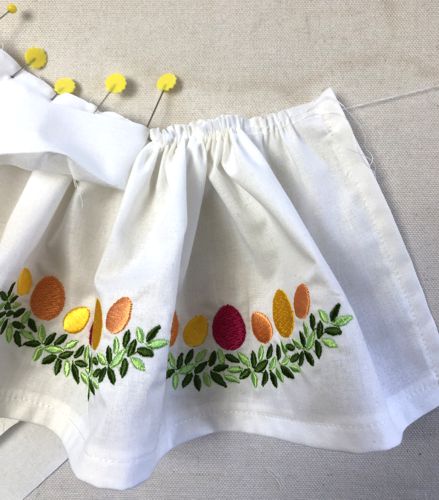
Pull the gathering threads and pin the apron between the 2 marking pins on the belt, right side to right side, raw edge to raw edge.
|
|
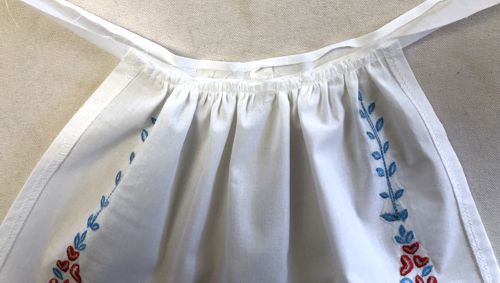
Stitch the belt to the apron.
|
|
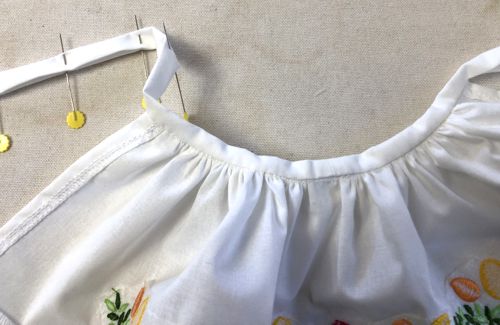
Fold the belt onto the apron to cover the raw edge of the apron and either machine- or hand-stitch in place.
|
|
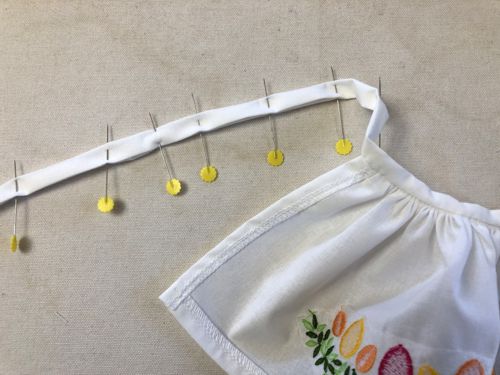
| Fold the ends of the belt. Press. Pin. Topstitch. |
|
To make the straps, fold the 2" x 17" strip lengthwise, wrong side inside, in half and press.
Unfold, then fold the right side inside. Aligning the long edges, stitch with 1/4" seam allowence to get a tube.
Turn the tube right side out. Press. FInish the short ends with zig-zag.
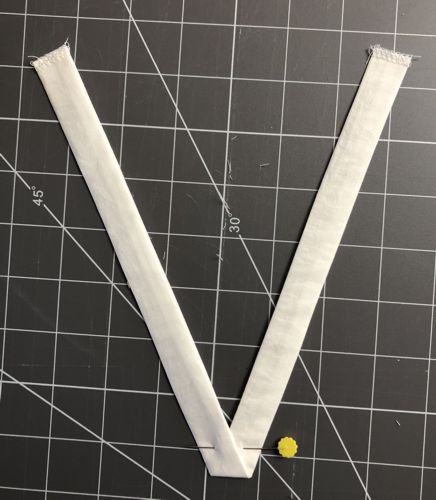
Mark the center of the strap. |

|
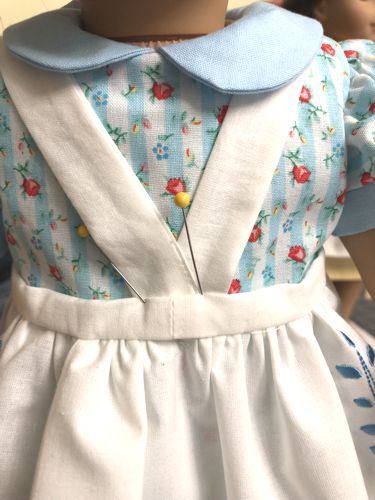
Fold the strap in V-shape and pin.
|
|
Pin the V end to the center on the wrong side of the belt. Topstitch in place.
|
|
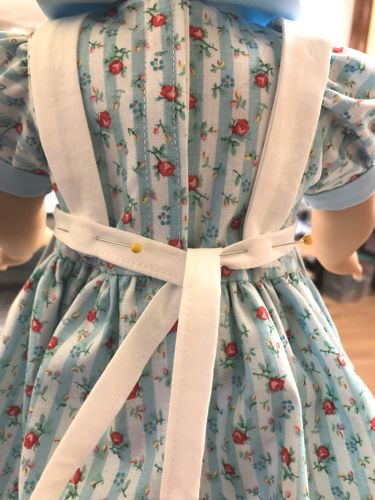
Put the apron on your doll and mark the position of the stap ends on the back. It's about 1" from the apron's edge, but better check!
Topstitch in place.
|
|
| The apron is done. |
|
Hope you'll enjoy the project!
|
|

|
|
| Have fun! |
|
Back to Easter Garland Set and Heart and Vines Border Set
|
Back to Projects Page
|
