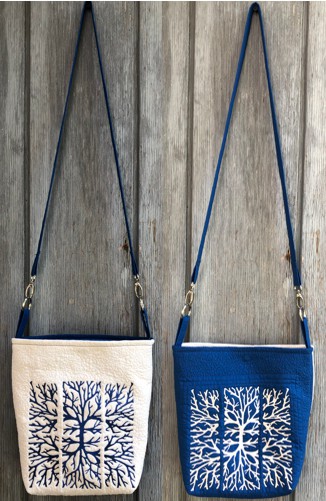
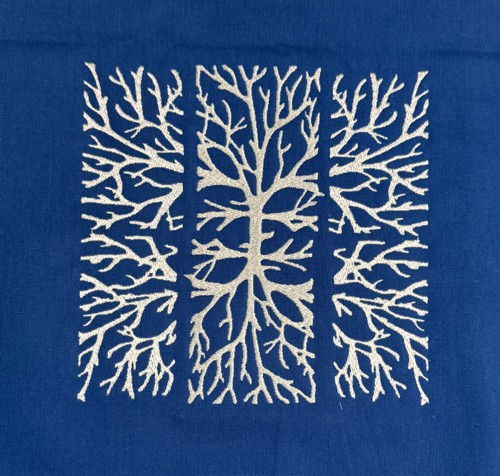
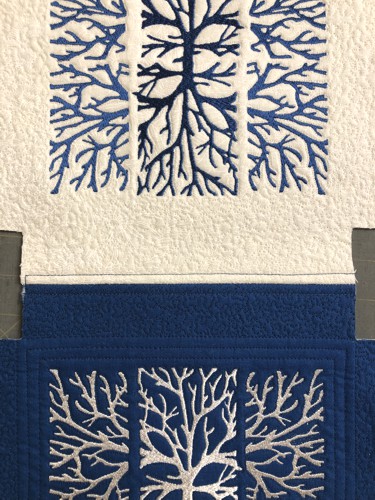
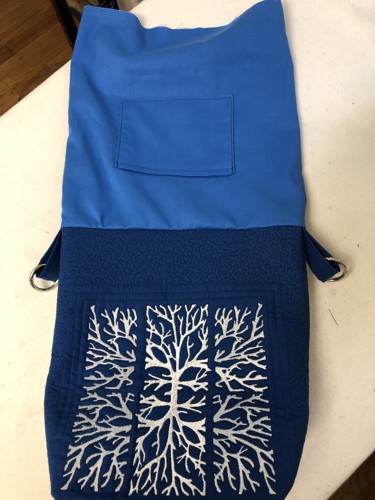
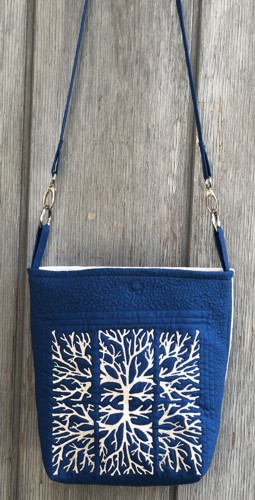
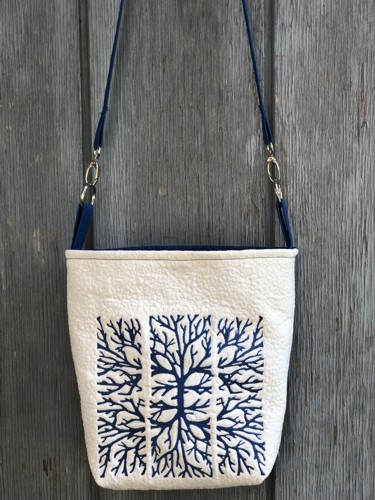
In this tutorial, you will learn how to sew a small crossbody bag and embellish it with machine embroidery. The design features an abstract rendering of tree branches, with one side of the bag being white with blue embroidery and the other side blue with white embroidery. This project is perfect for practicing your sewing and embroidery skills while creating a stylish accessory.
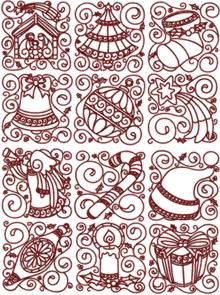
We used the designs from the Tree Branches Panel Set.
The finished size of the bag is about 10 1/2" W x 10" H x 3 1/2" D.
|
|
You will need :
- embroidery threads, white and royal blue;
- about 1/2 yard of royal blue fabric (we used a linen-cotton blend);
- 1 fat quarter of off-white fabric (we used a linen-cotton blend);
- about 1/2 yard of cotton fabric for the lining;
- polyester craft felt;
- iron-on sewing interfacing.
|
You will also need:
|
- quilter's ruler;
- rotary cutter and/or scissors;
- tailor's chalk pencil;
- iron;
- #12 universal needle, and sewing thread;
- #16 universal needle and extra strong thread;
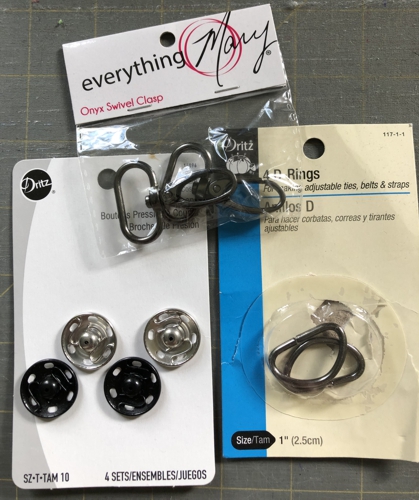
- 2 metal O or D rings;
- 2 swivels 1" wide;
- magnetic snap closure or sew-on snap 1/2" large.
|
|
Embroidery:
|
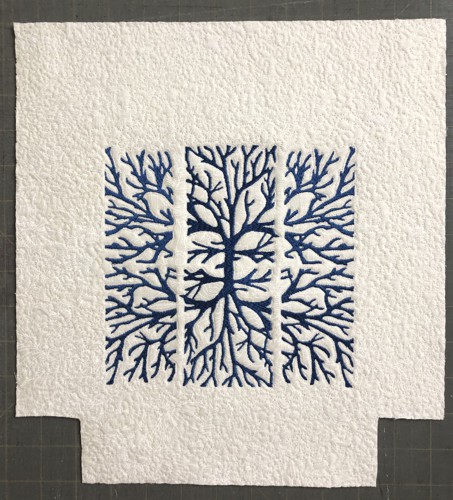
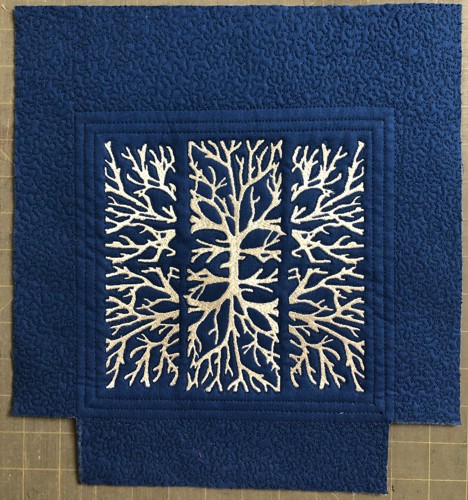
| Upload the Tree Branches Panel Set file into your machine. Stabilize a piece of royal blue fabric with polyester craft felt. Hoop the fabric tightly. Using white thread, embroider the larger design first, re-hoop and embroider the smaller design on the right side of the first one. Re-hoop and embroider the same design as a mirror image on the left side of the first one. |
|
Repeat on the off-white piece of fabric, using royal blue thread.
|
Preparing the Panels:
|
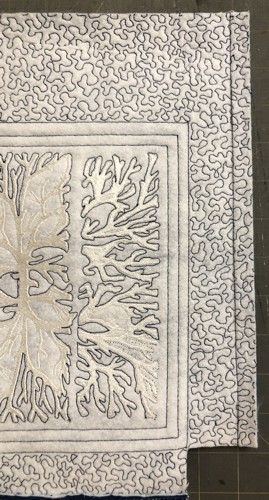
Quilt the stitch-outs in a free-motion style. Press with steam.
Trim the panels leaving 2 1/2" margins on the left, right and bottom sides; leave 3 1/2" margin on the upper side.
Make sure that both panels are of the same size - 12" x 12" squares.
|
| On the lower edge of both panels, cut out 2" x 2" squares at the corners. |
|
|
Handle:
|
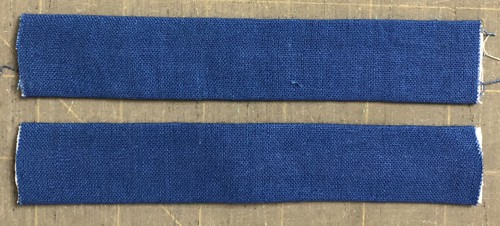
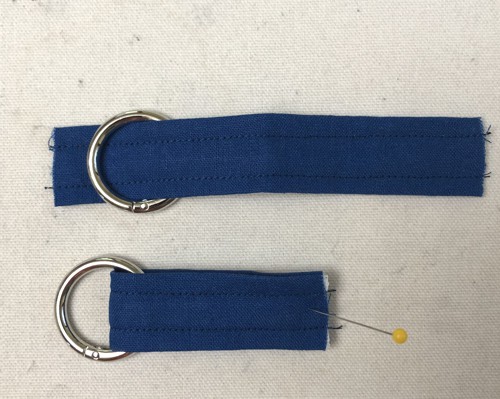
Out of blue fabric, cut 2 strips measurig 2 1/2" x 5 1/2".
Out of sewing interfacing, cut 2 strips measuring 1" x 2 1/2".
Fold the fabric strips lengthwise in half, face inside, align the edges. Stitch along the long unfinished edge, seam allowance 1/4".
Press the seam open. Turn the tubes right side out. Press so that the seam is in the center.
Using a safety pin, or a tool for inserting elastic, insert the interfacing strips in the tubes. Press again so that the interfacing adheres to the inside.
|
|
Top-stitch along the long edges 1/4" from the edge. Check that the strips are of the same length.
Thread the strips through the rings.
|
|
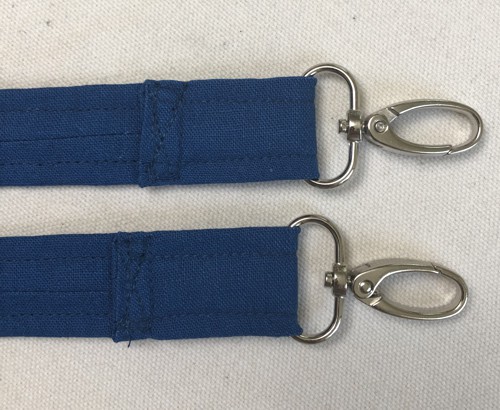
Out of the blue fabric, cut a strip 2 1/2" and the legth of the width of the fabric, about 40" - 44" long.
Out of iron-on interfacing, cut a strip 1" wide and 1/2" shorter than the fabric strip.
|
Fold the fabric strip in half lengthwise, face inside, align the edges. Stitch with seam allowance 1/4". Press the seam open.
Turn the tube right side out. Press so that the seam is in the center. Tuck the the short edges 1/4" inside. Press.
|
Insert the interfacing strip inside, press again.
Topstitch the short edges closed. Topstitch along the the long edges 1/4" from the edges.
Thread the ends through the swivel rings. Fold and topstitch the ends in place. |
|
The Lining:
|
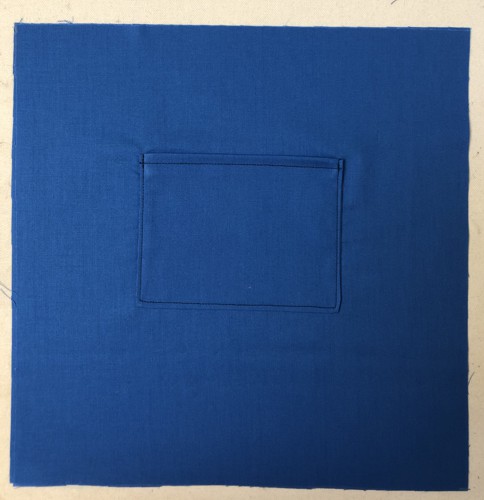
| Out of the fabric for the lining, cut 2 squares 12" x 12" each and a piece for a pocket measuring 6" x 9". |
Fold the pocket piece widthwise in half, align the edges, sew the side together, seam allowance 1/4". Turn the right side out.
Tuck the unfinished edge 1/2" inside, press and topstitch. |
| Position the pocket on one of the lining panels. Topstitch in place. |
|
Position the lining panels, face inside, align all edges. Stitch the sides together, seam allowance 1/4", leaving the lower and upper edges open.
Press the seams open.
|
Assembly of the Bag:
|
Position the front and back panels of the back together, face inside and aligning all edges.
Stitch the bottom edges together, seam allowance 1/2". Press the seam open.
|
|
| Topstitch on both sides of the seam with 1/4" seam allowance. |
|
Fold the working piece again, face inside. Stitch one side, seam allowance 1/2".
|
|
Press the seam open. Topstitch on both sides of the seam with 1/4" seam allowance.
Repeat for the other side. |
Fold the bottom of the bag so that the bottom and the side seams align. Pin.
Stitch. Seam allowance 1/2". Stitch several parallel lines. |
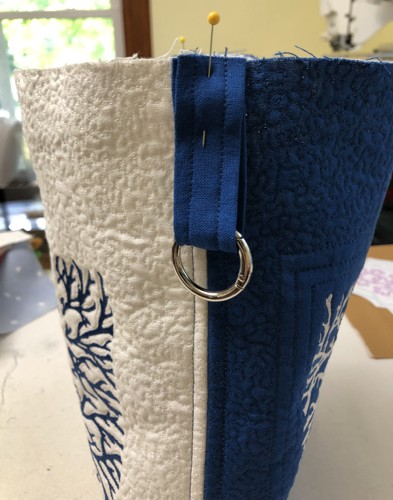
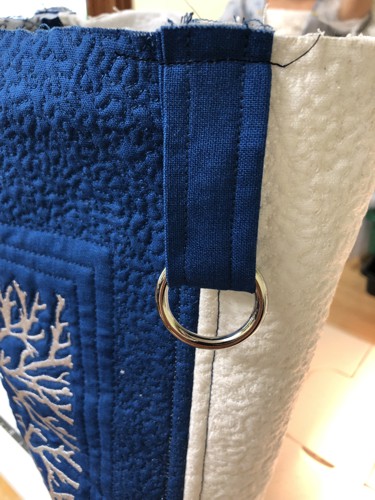
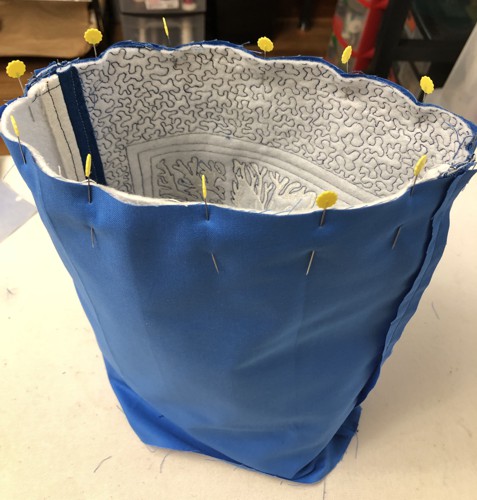
| Turn right side out. Pin the strips with the O-rings to the upper edge over the side seams of the bag. |
|
| Stitch the strip in place with seam allowance 1/4". |
|
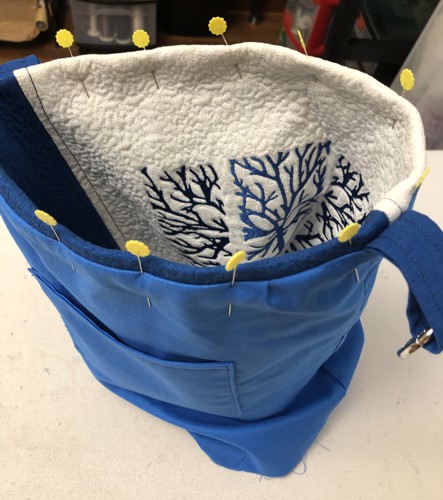
Put on the lining over the outer bag, right sides together. Align the side seams.
Align and pin the upper edges together.
|
|
Unfold the lining through the unstitched bottom.
|
|
Tuck the outer bag into the lining - wrong side to wrong side.
Fold the upper edge of the outer bag about 1/2" back and pin.
|
|
| Topstitch along the upper edge, seam allowance 3/8". |
Fold the bottom edges about 1/2" inside, press. Handstitch the bottom closed.
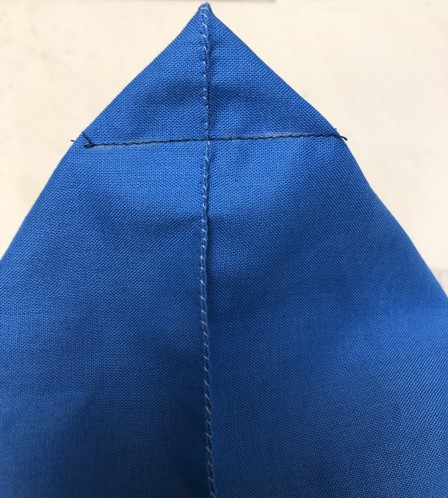
To make box corners, separate the front and back sides of the lining at the corners. Center the seam on the side with the seam on the bottom. Pin.
Measure 1 1/2" along the seam from the corner. Draw a line perpendicular to the seam across the corner and machine-stitch it.
Fold the corner towards the bottom and handstitch the tip to the seam.
|
|
Fold the bag with right sides together, unfold the upper edges and align all edges. Stitch one of the sides, seam allowance 1/2".
|
| Turn the working piece right side out. Tuck the lining inside the outer bag. |
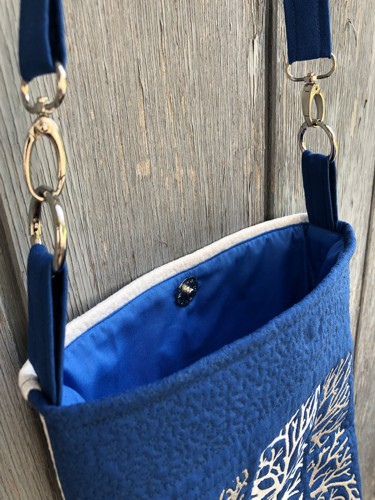
Sew on the snap. Buckle the handle.
|
|
|
| Have fun! |
|
|
|
Back to Tree Branches Panel Set
|
Back to Projects Page
|