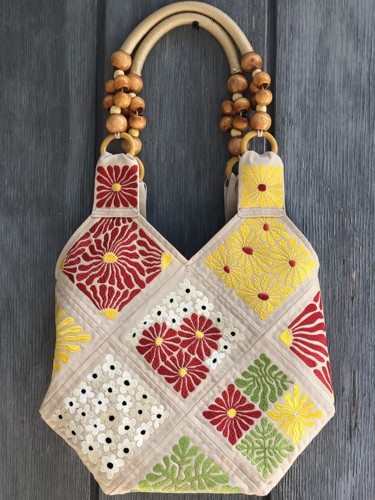
In this tutorial, you will learn how to sew and embellish a beautiful summer purse with flower blocks. The purse is made up of 13 blocks, each featuring a unique flower embroidery. We will guide you through sewing the blocks together and attaching wooden handles to complete your stylish bag. Let's get started on creating your Summer Flowers Purse!
This purse uses the designs from the Art Nouveau Flower Block Set II.
The designs are for the small hoop (4" x 4").
The finished size of the purse is about 13" x 13" excluding handles.
|
|
You will need
- embroidery threads, either polyester or rayon; the choice of colors is up to you;
- dense medium-weight canvas (duck cloth or cotton-linen blend);
- cotton fabric for the lining;
- light- to medium-weight cut-away embroidery stabilizer;
- #14 embroidery needle;
- #12 and #16 sewing needles;
- sewing dual-duty thread of matching color;
- purse handles with rings on the ends (we used a pair from Amazon.com);
- a piece of paper measuring about 16" x 16" for a paper template (a piece of wrap paper is good);
- a graph pencil;
- quilter's ruler and rotary cutter or scissors;
- chalk pencil.
|
Embroidery
|
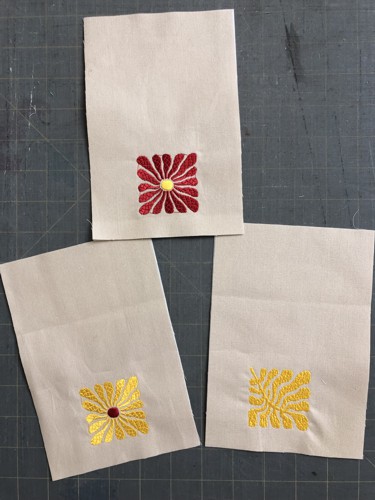
| Stabilize your material, hoop tightly. Upload the square designs into the machine and embroider them. For the bag, you'll need 13 squares, so you'll have to embroider 5 of them twice. You can make the doubles in the same colors or different ones. |
After the embroidery is done, trim the squares, leaving 1" margins around the embroidery.
|
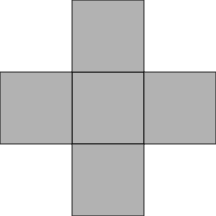
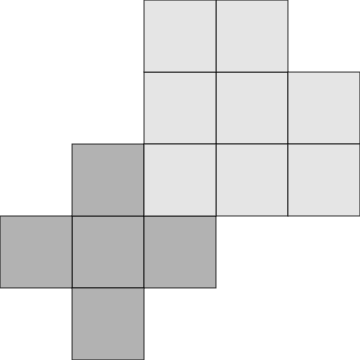
| Assembly: |
| Using 5 squares, sew a cross shape, seam allowance 1/2". |
|
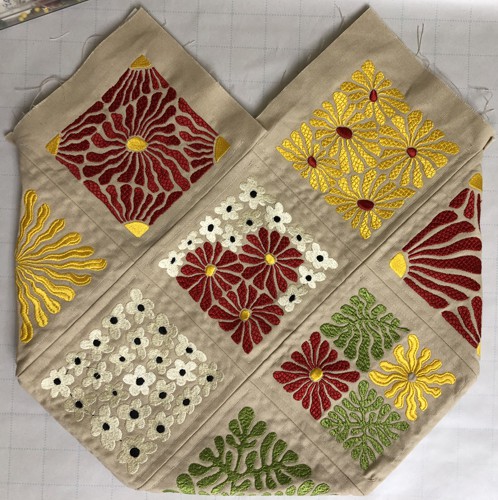
| Using the remaining 8 squares, sew the following shape as shown below: |

|
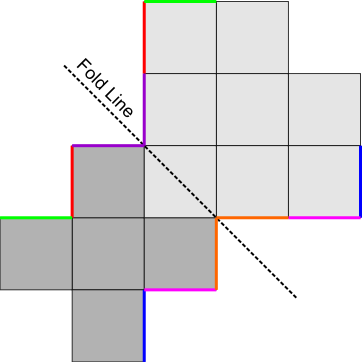
| Sew both parts together, as shown: |
|
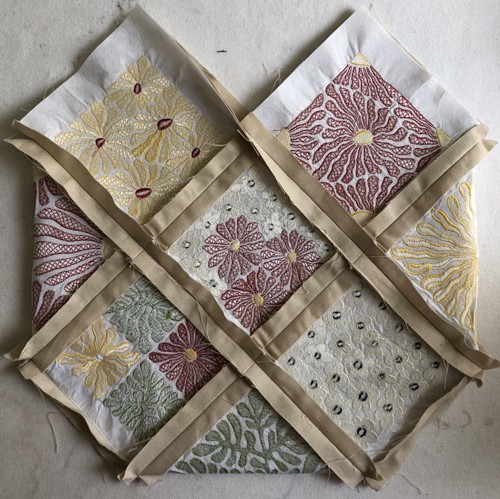
| Open the seams, press, and top-stitch with 1/4" from the seams. |
Fold the working piece in half, and pin together the edges color-coded in the diagram. Sew the parts together. Open the seams, press, and top-stitch as above.
|
|
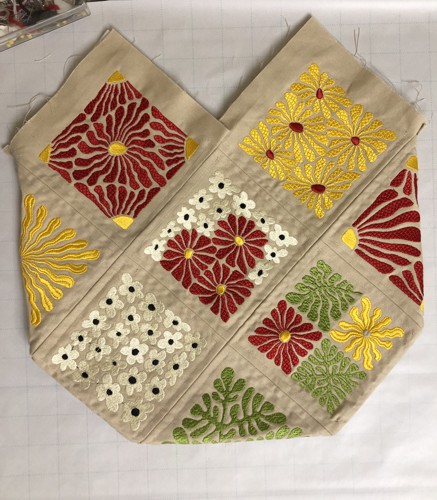
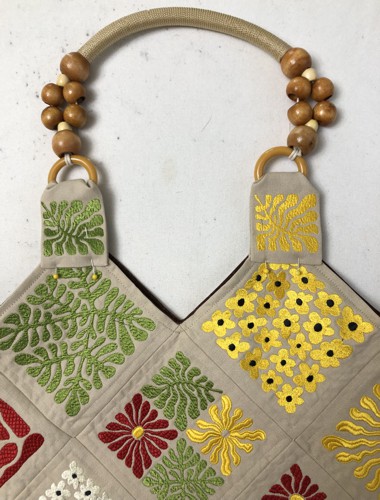
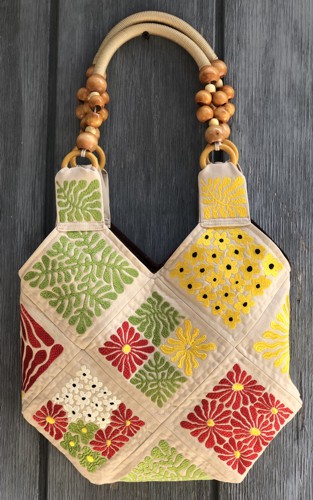
| The bag will look like the pictures below: |
|
|
| Lining: |
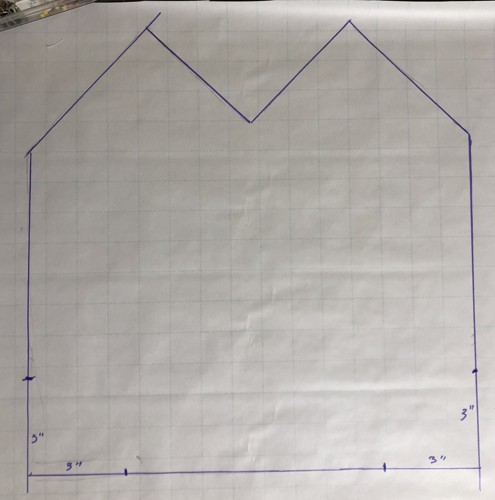
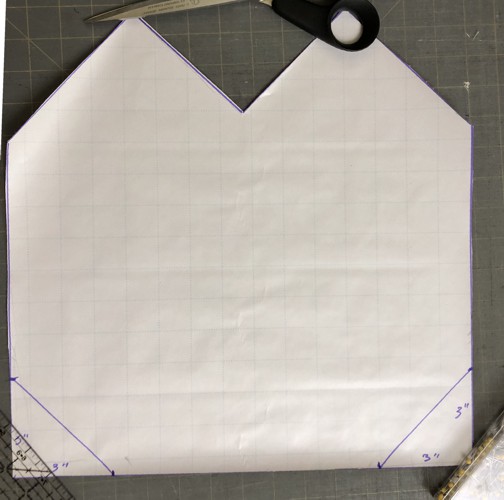
| Flatten the bag and place it on the piece of paper. Trace the outline of the bag with a graph pencil. |
|
Add 1/2" on the side and bottom for seam allowance. Do not add seam allowance on the upper edge.
|
|
| At the bottom corners, measure and mark 3" points in both sides. Connect the points. Trace the pattern with a marker for better visibility. Cut out the template. |
|
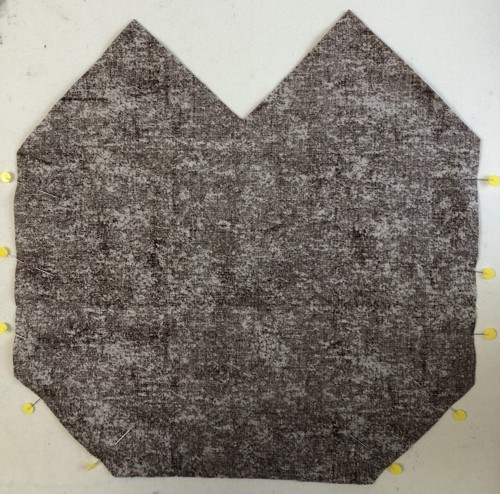
Position the templace on a folded piece of fabric for the lining. Trace and cut out.
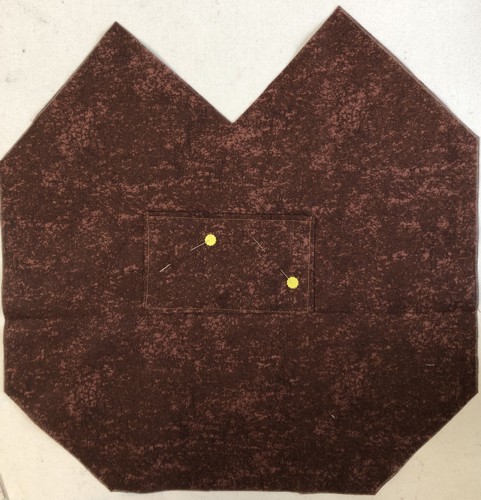
If you want an inner pocket, out of the same fabric, cut a piece measuring 6" x 8", fold it widthwise, right side to right side. Stitch together the sides.
Turn right side out. Tuck in the raw edge 1/4" inside. Press and top-stitch the opening closed. |
| Place the pocket on the lining and top-stitch it in place. |
|
| With right sides inside, pin and sew the lining parts together along the sides and the cut-out corners. Leave the bottom open. Seam allowance 1/4". Press the seams open. |
|
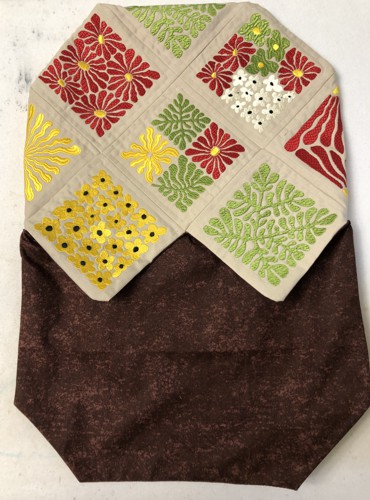
Insert the bag into the lining, right sides together. Align the side seams. Align and pin along the upper edge.
Stitch along the upper edge, seam allowance 1/2". Trim the corners, press.
Through the opening in the bottom, turn the bag right side out. Straighten the corners, press.
Tuck the edges of the opening in the lining 1/4" inside, press. Stitch the opening closed by hand.
Tuck the lining inside the bag. Press the upper edges. Topstitch along the upper edge, seam allowance 1/4". |
|
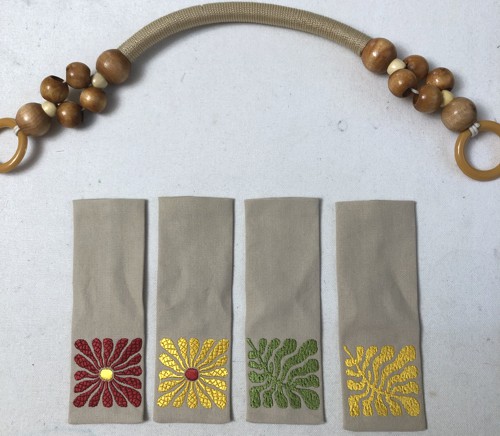
Handles:
|
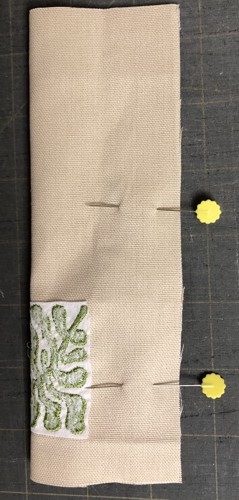
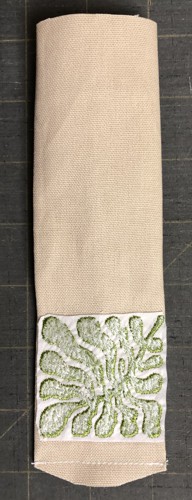
For the handles, embroider the small designs from the set. You will need 4 stitch-outs.
Trim the stitch outs, leaving 3/4" margin at the bottom, 1 1/2" on the sides and 4 1/2" margins on the upper edge of the embroidery. |
|
Fold a stitch-out lengthwise in half, face inside. Pin.
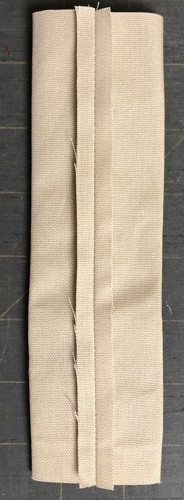
Stitch along the side, seam allowance 1/4". |
|
| Press the seam open. |
|
| Stitch along the bottom side, seam allowance 1/4". |
|
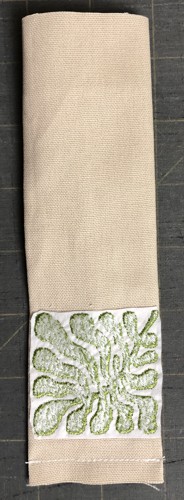
| Trim the corners and turn right side out. |
|
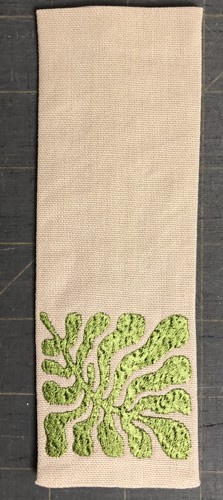
| Turn right side out. Tuck the upper edge 1/2" inside and press. Either topstitch or hand-stitch close. |
|
| Repeat for the remaining 3 stitch-outs. Make sure that the parts you get are all of the same length. |
|
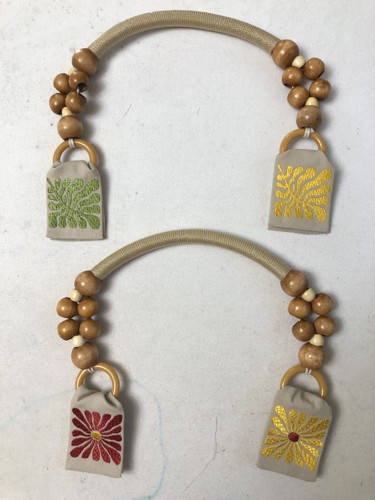
| Insert the embroidered loops into the rings on the handles. Fold in half. |
|
Working with one handle at a time, pin the ends to the protruding corners of the upper edge.
|
|
Topstitch the loops in place in place through all layers. For this you might need a #16 universal needle.
|
| Have fun! |
|
|
Back to Art Nouveau Flower Block Set II
|
Back to Projects Page
|