|
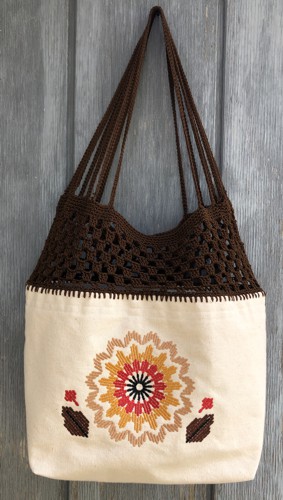
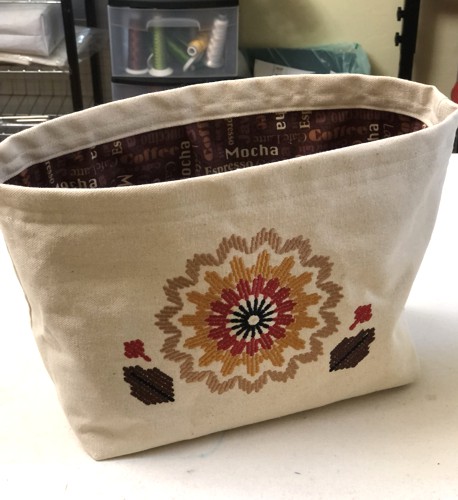
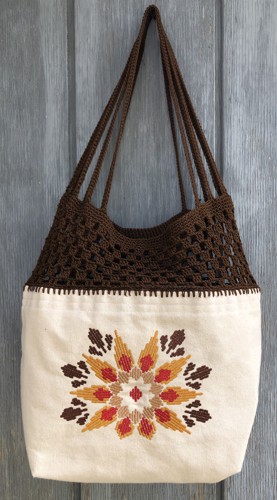
Welcome to this tutorial on making a market bag with a crocheted top and embroidered flower designs. You'll learn how to sew the bag, add beautiful machine embroidery, and finish it off with crochet. This project is perfect for combining your sewing, embroidery, and crochet skills into one practical and stylish item. Let's get started! To embellish the canvas part of the bag we used the designs Southwestern Flower Motif and Southwestern Flower Motif.
The top is crocheted with fingering-weight cotton thread.
The finished size of the bag is about 10"W x 11"H x 5"D.
|
|
Besides embroidery and sewing machines, you will need :
- a piece of light-colored canvas/duckcloth for the outer bag;
- a piece of light-weight cotton for the lining;
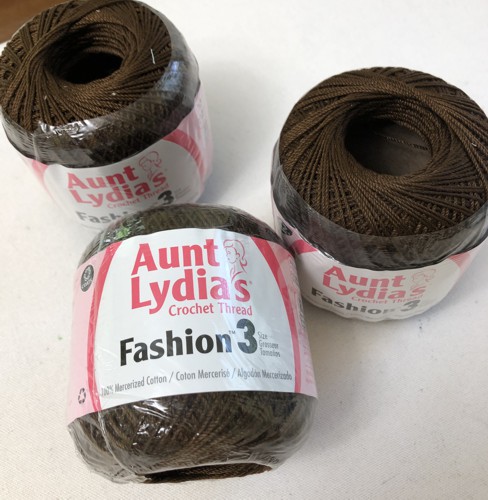
- Aunt Lydia's crochet thread #3 one and a half balls (choose any color you prefer).
|
|
You will also need:
|
- quilter's ruler,
- rotary cutter and/or scissors,
- tailor's chalk pencil,
- iron,
- #12 universal needle, and sewing thread,
- #16-18 jeans needle and extra strong thread;
- crochet hook 3.5 mm;
- stitch markers (quilter's safe pins work well);
- an awl.
|
Embroidery:
|
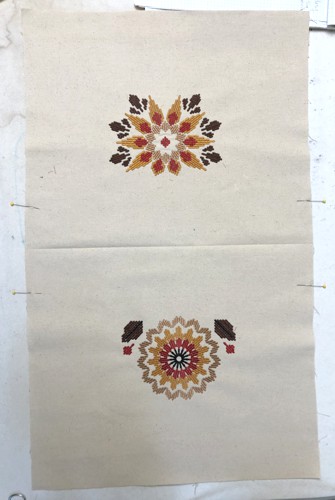
Cut a piece of canvas measuring 26" x 16". Fold it in half widthwise and press the folded line with hot iron.
Measure 3 1/2" up and down from the creased line on both parts of the canvas. The lower edge of each embroidery should be approximately at this ldistance from the creased line. |
Select embroidery threads. Our crochet thread is brown, so we chose emboidery threads in earth tones. You can use other colors to match your crochet thread.
Stabilize the fabric with medium-weight cut-away stabilizer. Hoop the fabric tightly. Upload the Southwestern Flower Motif # 30393 and Southwestern Flower Motif #30540 files into your machine and embroider them on each part of the canvas. |
|
Sewing the Lower Part of the Bag
|
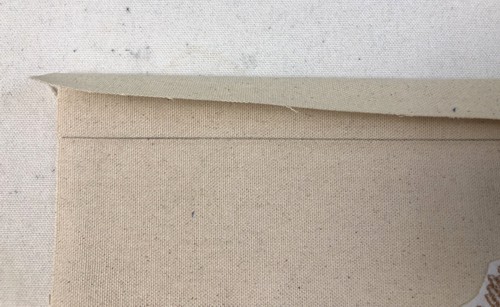
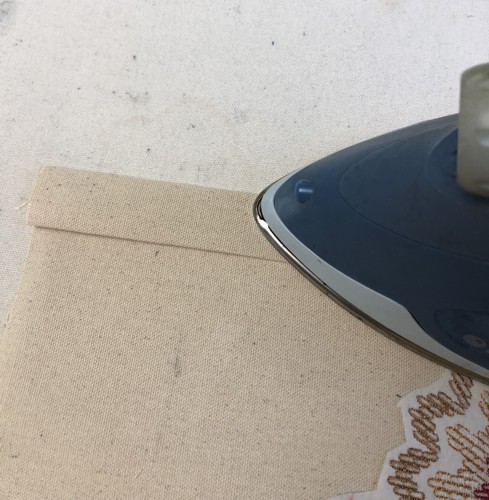
With the ruler and graph pencil draw a line 1" from one of the short edges of the canvas. Draw another line 1" from the first one.
Fold the edge by the first line and press with steam. |
|
| Fold again, by the second line, and press with steam. |
|
Repeat for the other short edge.
|
Unfold the upper edges. Fold the working piece by the central creased line, align all edges. Sew the side together, seam allowance 1/2". Press the seams open.
|
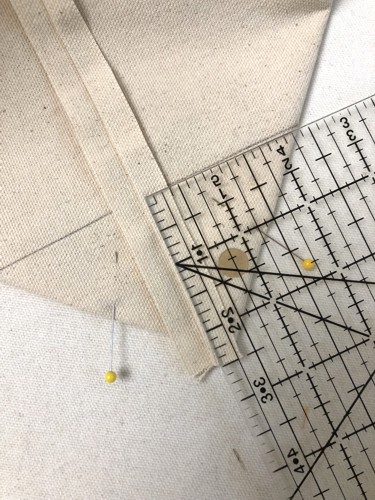
To make box corners, separate the front and back sides at the corners. Center the seam on the side with the bottom crease.
Measure 2 1/2" along the seam from the corner.
Draw a line perpendicular to the seam across the corner. |
|
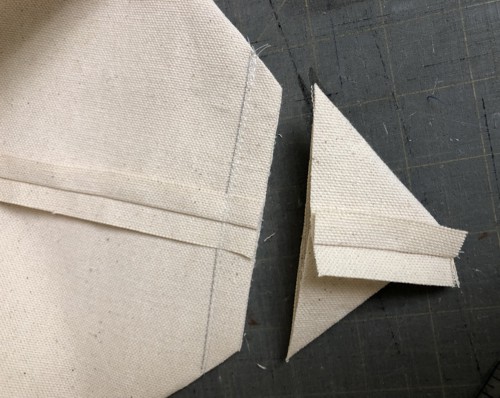
Stitch along the line, then stitch again 1-2mm from the line.
Cut the corner with seam alowance 1/2".
Repeat for the other corner.
|
|
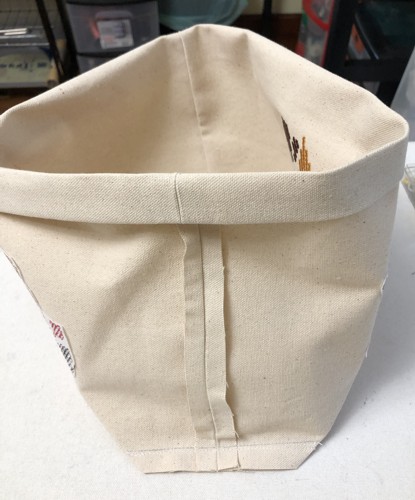
| Fold the upper edges back. |
|
For the lining, out of light-weight cotton fabric, cut a piece measuring 22" x 16".
Fold it widthwise, face inside, and press the bottom line.
Sew the sides, seam allowance 1/4".
|
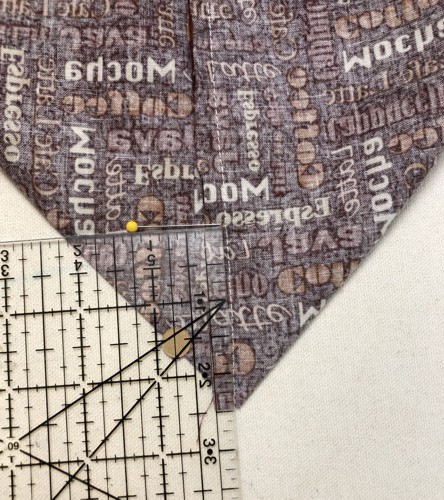
To make box corners, separate the front and back sides at the corners. Center the seam on the side with the bottom crease.
Measure 2 1/2" along the seam from the corner.
Draw a line perpendicular to the seam across the corner.
Stitch along the line.
|
|
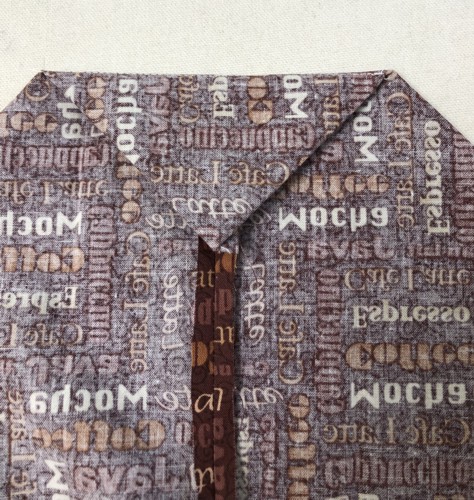
Fold the corner onto the side and press. Sew the tip of the corner to the side seam by hand with few stitches.
|
|
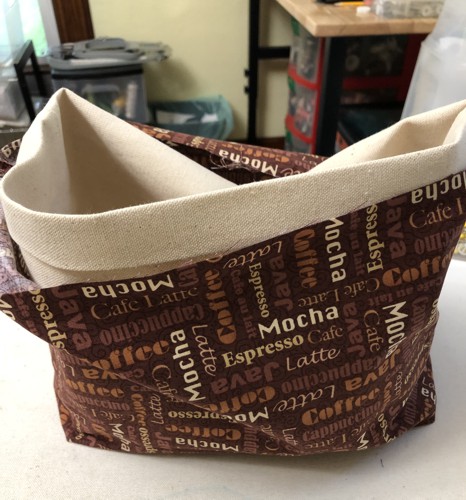
With wrong sides together, tuck the outer bag in the lining. Align the side and bottom seams.
|
|
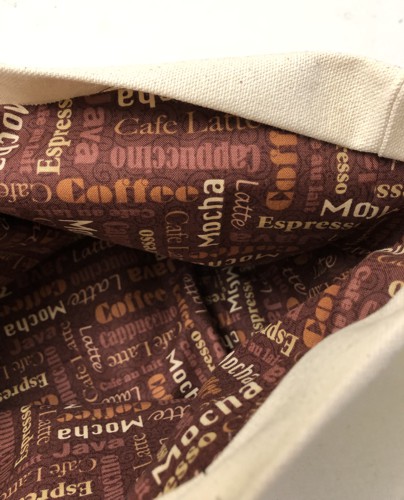
Neatly tuck the upper edge of the lining under the folded edge of the outer bag, sligning the upper edge of the lining with the folded line of the outer bag.
Pin together.
|
|
Stitch along the folded edge of the outer bag twice - 1/8" and 1/4" from the edge.
|
|
Chrocheted Part of the Bag:
|
| To work this part of the bag you need to know basic crochet stitches: chain (ch), slip stitch (sl.st.), single crochet (sc), double crochet (dc). |
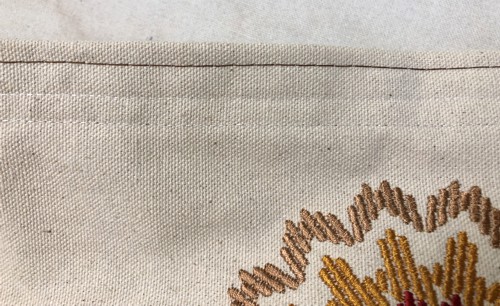
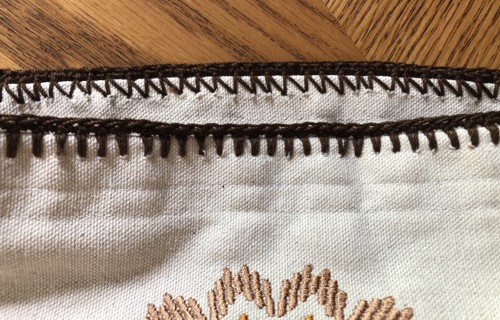
On your sewing machine choose the longest stitch it can make (usually 7-8mm). Using the #18 needle and a contrast thread, topstitch along the upper edge of the canvas bag, 1/4" from the edge.
|
|
With an awl make the holes from the needle larger.
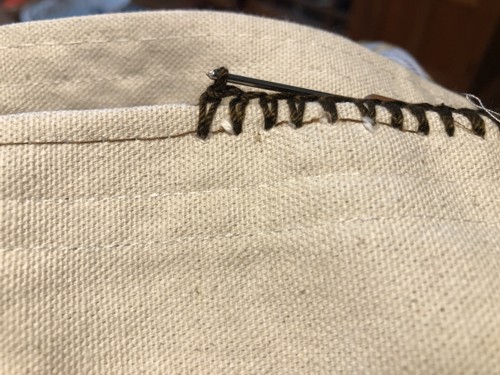
Starting with the side seam, insert the crochet hook into the first hole, thread over, pull the loop through the hole and up to the edge of the bag, thread over, pull it through the loop. Insert the hook into the second hole and repeat the procedure. Continue around.
|
|
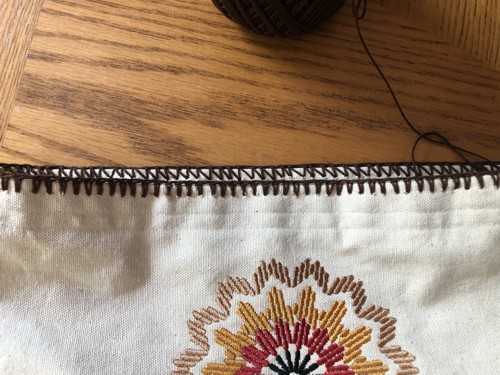
Finish crocheting over the edge after the last hole is done.
|
|
Chain 1 (ch1) and work a round of single crochet (sc) stitches to make a foundation round.
|
|
Continue to work in rounds, in the end of each round join with a slip stitch (sl.st.) into the top of the starting chain 3 (ch3).
|
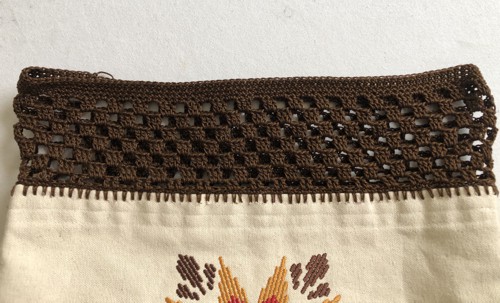
Round 1: ch3 (counts as 1 double crochet stitch), 1 double crochet (dc) in the next sc, *ch 2, skip 2 sc, 1 dc in each of the next 2 sc - repeat from * around.
|
Round 2: with 2 slip stitches move to the first chain-2-space (ch-2-sp), insert the hook under the chain, ch 3 (counts as 1 dc), 2 dc under the same ch-2-sp, *ch 2, skip 2 dc, 3 dc under the ch-2-sp - repeat from * around.
Repeat round 2 five more times or to desired length. |
Next round: *work 2 sc under the ch-2-space, 1 sc in the first dc, skip the second dc, 1 sc in the third dc - repeat from * around.
Next round: work 1 sc in each sc around. Repeat this round 5 more times or to desired length.
Cut thread and weave in the end. |
|
| Handle: |
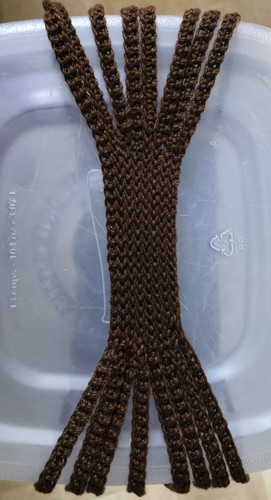
| The handle consists of 8 separate strips connected together in the middle of the handle with slip stitches. |
|
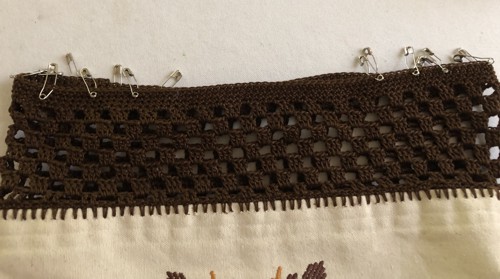
Count the number of stitches around. Divide them in half so that the front and back panels have the same number of stitches. Please note that the difference of 1 stitch is not crucial. Place markers.
Starting from the right side marker, place markers for the handle strips with 5 stitch intervals: 4 markers on the front and 4 markers on the back panel. Repeat for the left side. There are 16 markers for the strips in all.
|
|
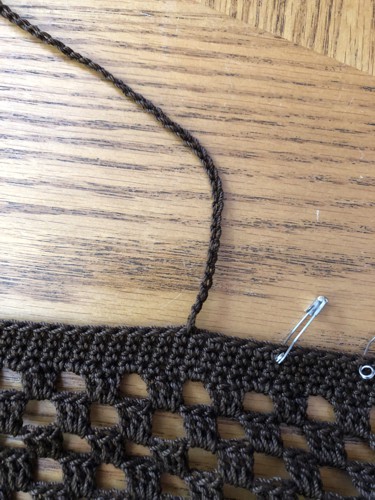
Row 1: Attach yarn to the first marked stitch on the right side of the front panel, chain 120.
With the slip stitch attach the chain to the nearest to the center marked stitch on the left side of the front panel.
|
|
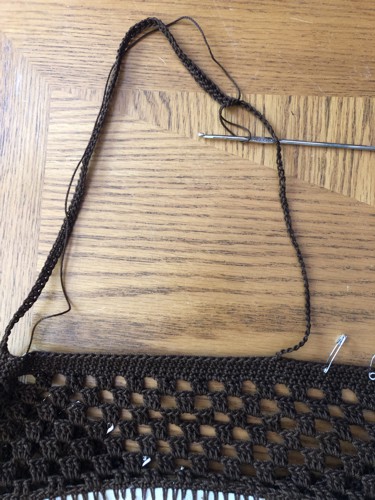
Row 2: Insert the hook into the next sc stitch to the left, thread over, pull, turn and work 120 sc along the chain. Attach the strip with the slip stitch to the sc stitch next to the first marked st.
|
|
| Count the stitches on the first strip and place markers: 50 sts, place a marker, 20 stitches, place a marker. All following strips will be connected together in the part with 20 stitches in the middle. |
| Row 3: With slip stitches move to the next marked stitch to the right. Chain 50, with 20 slip stitches connect to the fist strip, chain 50. With the slip stitch attach the chain to the next marked stitch on the left side of the front panel. |
| Row 4: Insert the hook into the next sc stitch to the left, thread over, pull, turn and work 50 sc along the chain, 20 slip stitches along the middle part, 50 sc along the chain. Attach the strip with the slip stitch to the sc stitch next to the marked st. |
| Repeat rows 3-4 until you work all 8 strips. |
|
|
|
|
| Have fun! |
|
Back to Southwestern Flower Motif # 30393 and Southwestern Flower Motif #30540.
|
Back to Projects Page
|
