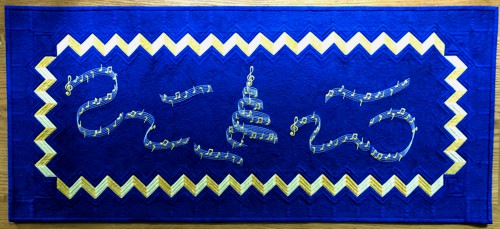
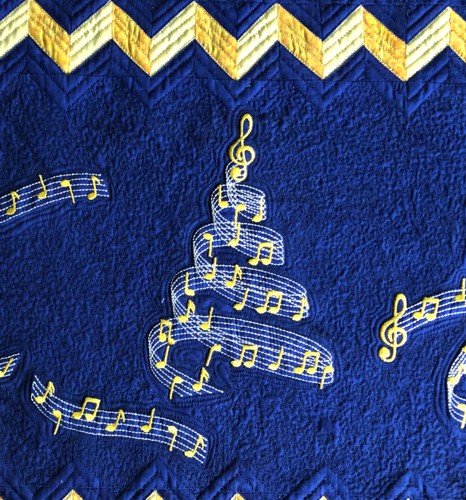
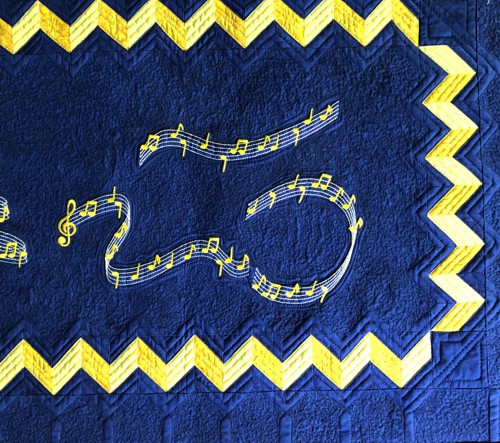
Create a festive table runner perfect for the holiday season with our Christmas Carols Tablerunner tutorial. Learn how to sew and embellish the runner with machine embroidery featuring colorful Christmas trees and shapes imitating fields of snow made from musical notes. We'll guide you through each step, from sewing to quilting, to bring this cheerful decoration to life. Let's get started and add some holiday spirit to your table!
The piecing of this border is a little bit intricate, but the final results are rewarding.
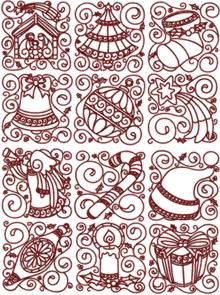
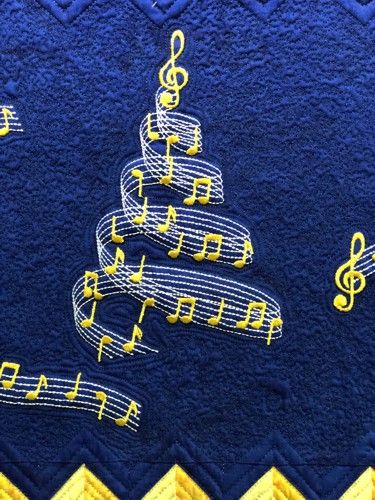
For this small quilt we used the designs from the Christmas Tunes Set.
The finished size of the tablerunner is about 36 1/2" x 18 1/2".
|

|
|
You will need :
- embroidery threads, either polyester or rayon, for the embroidery,
- medium-weight cut-away stabilizer,
- about 1 yard of royal blue fabric,
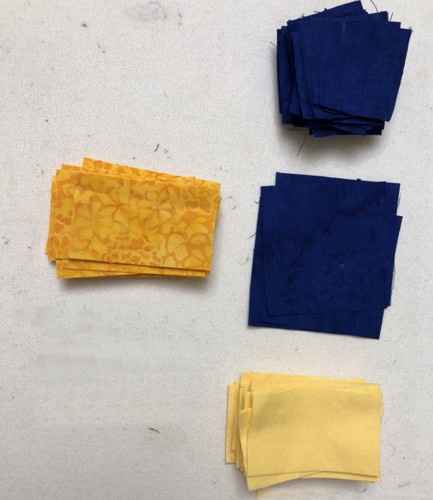
- 1 fat quarter each of 2 fabrics of light and dark yellow,
- fabric for the backing,
- batting,
- iron,
- quilting threads of matching colors,
- #12 quilting and sewing needles.
|
| Cutting: |
Out of royal blue fabric, cut
- a central piece measuring 10 1/2" x 32 1/2",
- four squares measuring 2 1/2" x 2 1/2",
- 2 strips measuring 2 1/2" x 18 1/2",
- 2 strips measuring 2 1/2" x 36 1/2" and
- several strips 1 1/2" wide and the length of the width of the fabric.
- Subcut the l 1/2" wide strips into 168 squares 1 1/2"x 1 1/2" each.
Cut the remaining fabric into 3 strips 2 1/2" wide and the length of the width of the fabric for the binding.
Out of light yellow fabric, cut 42 strips measuring 1 1/2" x 2 1/2" each.
Out of dark yellow fabric, cut 42 strips measuring 1 1/2" x 2 1/2" each. |
The Border Blocks:
|
Note: Seam allowance is 1/4", preass the seam immediately after you make it.
|
| Set aside light yellow strips, dark yellow strips and royal blue squares. They will be used for blocks on the first border. |
|
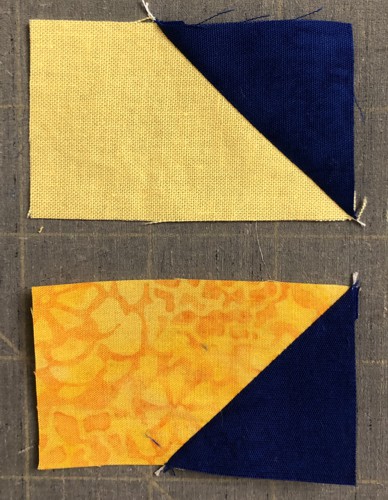
Working with the other strips and squares:
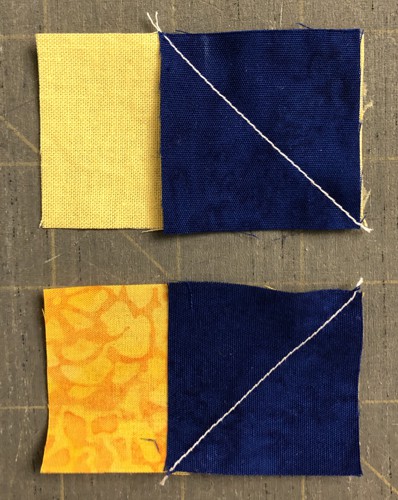
Cover the right part of each of the strips with the squares.
For the light yellow strips: Stitch on a diagonal from the upper left corner to the lower right corner.
For the dark yellow strips: Stitch on a diagonal from the upper right corner to the lower left corner.
|
|
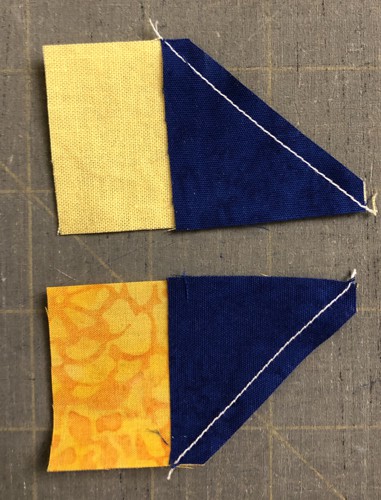
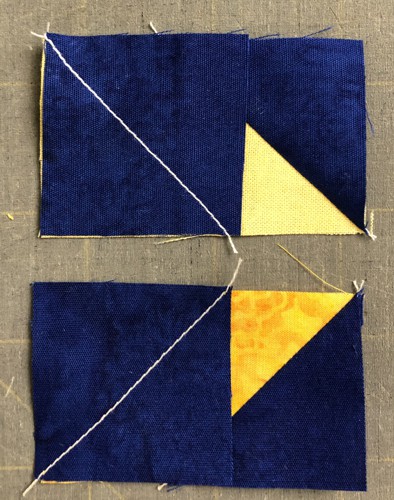
Trim with seam allowance to scant 1/4".
|
|
| Press the seams: for light yellow strips towards blue fabric, for dark yellow strips towards the yellow fabric. |
|
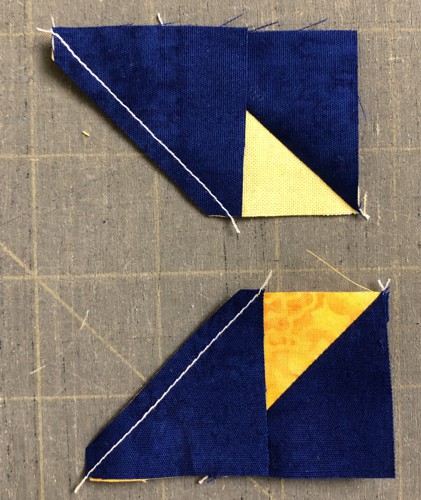
Cover the left part of the strips with squares.
For the light yellow strips: Stitch on a diagonal from the upper left corner to the lower right corner.
For the dark yellow strips: Stitch on a diagonal from the upper right corner to the lower left corner. |
|
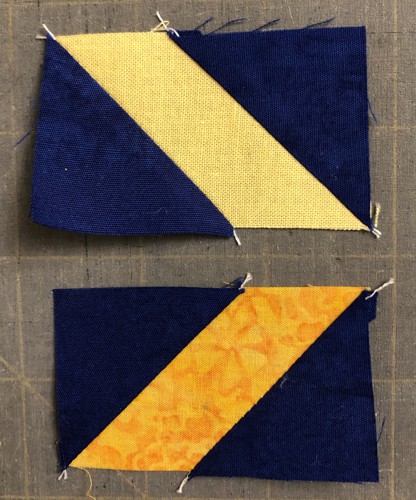
| Trim with seam allowance 1/4". |
|
| Press the seams: for light yellow strips towards the blue fabric, for dark yellow strips towards the yellow fabric. |
|
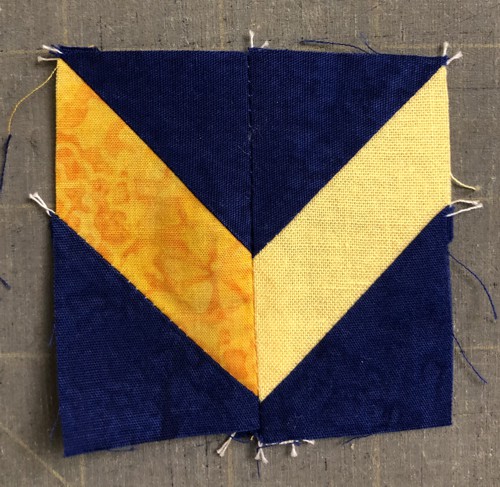
| Sew the light and dark yellow pieces in pairs to get 42 blocks. Press the seam open. |
|
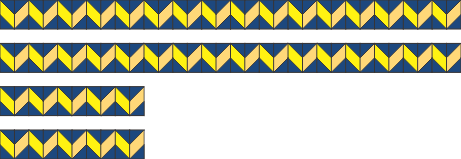
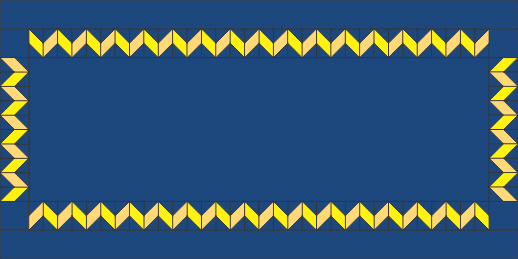
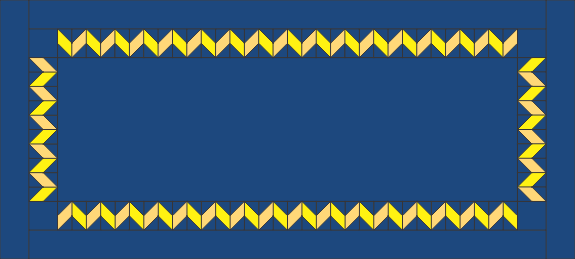
Sew 2 borders with 16 blocks in them and 2 borders with 5 blocks in them.
|
|
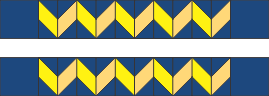
Sew the 2 1/2" blue squares to the ends of the 5-block strips.
|
|
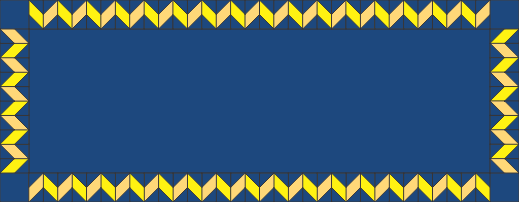
| Attaching the Borders: |
| Sew the 16-block borders to the long edges of the 10 1/2" x 32 1/2" central part. |

|
| Sew the 5-block borders to the short edges of the central part. |
|
| Sew the blue 2 1/2" x 36 1/2" strips to the long edges of the working piece. |
|
| Sew the remaining blue 2 1/2" x 18 1/2" strips to the short edges of the working piece. |
|
| Embroidery |
Upload both files from the Christmas Tunes Set into the embroidery machine.
Mark the position of the embroidery on the central part. If you have a printer and embroidery software, print-outs of the designs can be helpful. If you do not, you can cut out rectangles of the same size as the designs and arrange them on the fabric to determine the position of the embroidery.
Stabilize the background fasbric with the cut-away stabilizer. Embroider the files one by one. |
| Quilting and Finishing: |
Now place the backing on a flat surface (table) face down. Cover with batting. Spread your working piece over it.
Pin all layers together.
We quilted in a free-motion style all over the tablerunner. |
|
| Press with heavy steam. Square the working piece. Finish the raw edges with the binding. |
|
Happy stitching! Have Fun!
|

|
|
|
Back to Christmas Tunes Set
|
Back to Projects Page
|