For this project, we took a ready-made T-shirt and transformed it with the help of cutwork embroidery.
We used the design Rose Cutwork Lace for the mega hoop (6" x 10").
|

|
You will need :
- embroidery threads, either polyester or rayon - choose colors to your taste,
- a V-neck T-shirt of any color and size;
- a piece of cotton fabric large enough to be hooped, color of your choice, (we used navy blue);
- a piece of either silk or polyester organza, large enough to be hooped, color of your choice, (we used black);
- small sharp scissors;
- iron;
- #12 universal needle.
|
| Before you start embroidery, make a print-out of the design and check whether it fits the neckline of your T-shirt. |
Embroidery:
|
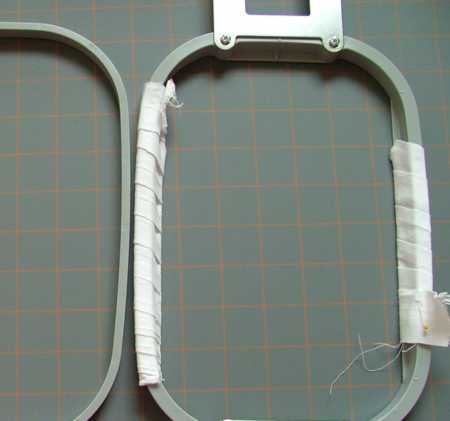
| Make a sandwich of water-coluble mesh (1-2 layers), organza and fabric. Hoop it tightly. We recommend to wrap the long sides of the inner frame with strips of muslin. After you hoop the stabilized fabric, you can also pin the edges of the fabric to the muslin strips. This will help to hold all 3 layers in place. |

|
| Upload the file Rose Cutwork Lace into your embroidery machine. Start embroidering. The first color will embroider the outline of the design. |
| Take the hoop from the machine. DO NOT UNHOOP! With a pair of sharp scissors cut away the fabric (ONLY the fabric!) around the outline, inside the outline and around the floral motifs. Take care not to cut through the organza and stabilizer layers. |

|
| Return the hoop to the machine and finish embroidering. |

|
Cut away the excess stabilizer and wash away the remainder. It's a good idea to leave the stitch-out to soak in a bowl of water for some time, change the water several times.
Leave to air dry.
Press, if needed. |

|
Assembly:
|
Cut away the excess organza around the stitch-out, leaving 1/2"-1" margins.
|

|
| Prepare the V-neck T-shirt. |

|
Position the stitch-out over the V-neck. You can play around with the position of the lace.
In our case only a small part of the upper edge protrudes above the V-neck. |

|
| Pin the lace in place. |

|
| Using the same thread with which you made the embroidery, topstitch the lace to the T-shirt along the inner edge of the lace. After the pins are removed, using not a dense zig-zag, stitch again along the outer edges. |

|
| With a pair of sharp scissors, cut away the remaining organza around the lace edges. |

|
|
|

|
| Have fun! |

|
|
Back to Rose Cutwork Lace
|
Back to Projects Page
|
