For this very easy project we used the design of the Blue Mandala for the commercial size hoop, though the smaller size can also be used.
|

|
|
You will need :
- embroidery threads, either polyester or rayon (we used shades of blue, but feel free to choose your own colors),
- wash-away mesh stabilizer,
- light-colored organza (we used white),
- round hoop for hand embroidery, we used 12" in diameter, but smaller ones (8"-11" dia) will also work,
- either univesal glue, or 1/4"-3/8" wide fabric scotch tape,
- a piece of cord or ribbon to hang the finished work,
- acrylic paint (optional),
- scissors,
- iron,
- Swarovski crystals or rhinestones (optional).
|
Embroidery:
|
Stabilize the piece of organza with wash-away mesh stabilizer. Hoop it tightly.
Upload the file of the Blue Mandala into the machine and embroider it. |
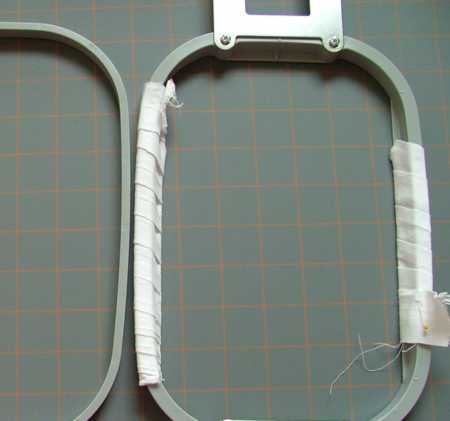
Please note that layers of organza and wash-away mesh stabilizer are very thin. The machine can easily shift the fabric in the embroidery process and ruin the embroidery. To avoid this, we recommend to wrap the long sides of the frame/hoop with strips of muslin. They add a bit of friction to hold the fabric in place. After you hoop the fabric and stabilizer, pin the edges to the muslin.
|

|
After you are done with embroidery, cut the stabilizer close to the stitches, wash away the remainder. Roll the stitch-out in a towel to squeeze out the moisture. Then leave to air dry.
|

|
| Painting the Hoop (optional): |
While you are waiting the stitch-out to dry, you can paint the hoop.
Open the hoop and paint the outer circle (the one with the screw). Leave to air dry. |

|
| Making the Suncatcher: |
| If you want to decorate the stitch-out with rhinestones, do it at this stage. |

|
| We attached a few crystals: |

|
| Now insert the stitch-out into the hoop. Try to make the margins between the stitch-out and frame the same width all around. Stretch the fabric to avoid any creases and folds. Tighten the screw. |

|
| Cut away the excess organza, leaving 1/2" margins. Make notches. |

|
| Fold the notches inside and glue them to the hoop. You can also use fabric adhesive tape to stick them in place. |

|
| Tie a piece of cord. to the screw and hang the finished suncatcher wherever you like. |

|
| Enjoy! |
|
|
Back to Blue Mandala
|
Back to Projects Page
|
