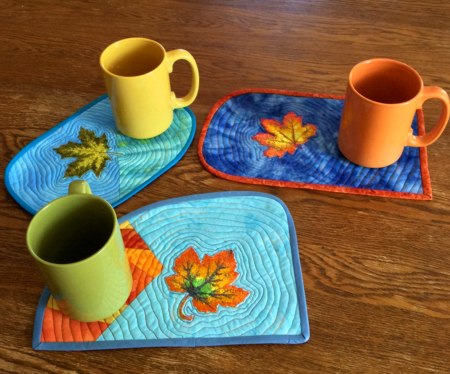
For this super easy project we used the designs from the Autumn Maple Leaf Set.
You can use any kinds of fabric or quilt scraps you have laying around. This is also a good opportunity to practice your quilting. We used primarily blue fabric, to make the mugrugs look like puddles of water with leaves floating in them.

You will need :
Piecing:
For the first mug rug we used a piece of batik fabric. The piece can be of any size and shape, just big enough to be hooped.

For the second mug rug we pieced the backgrounds from 2 batiks.

We sewed the two scraps together on a diagonal for a more interesting look.
Note: seam allowance is 1/4", press each seam after you make it.

The background of the third mug rug consists of really small scraps.

You can assemble some scraps into a "crazy" piece. This is a way to use up small scraps that were headed for the waste bin. However, this is time consuming and takes some patience. We used yellow, orange and red scraps to match the leaf embroidery.

Start with the 2 smallest scraps and sew them together.

Trim any side of the working piece to make it straight.

Add a new piece.

Trim again on any side.

Add a new scrap to the trimmed side.

Go on until you are satisfied.

Embroidery:
Stabilize each piece of the background with a light-weight tear-away stabilizer and embroider the leaves from the Autumn Maple Leaf Set.
Quilting and Finishing:
Now place the backing on a flat surface (table) face down. Cover with batting. Spread your working piece over it.
Pin all three layers together with 1" pins and start quilting. We echo quilted all three pieces using multi-colored Sulky quilting threads.
It's not seen on the pictures very well, but using orange-blue-yellow-brown or green-blue-yellow threads adds some artisting touch as if sun plays in water.


After the quilting is finished, press the work with heavy steam.
Now we have to trim the edges. You can square the work -- all corners should be 90 degrees and opposite sides should be of the same length. However, as we are making "puddles", feel free to make them of any shape you'd like.


Finish the raw edges with the binding. Press again.

Enjoy!
