This small, fashionable clutch purse features the FSL Battenberg V-Shaped Insert design.

You will need a piece of soft faux-leather fabric, fabric for lining, iron-on light-weight interfacing and a magnetic clasp.
For embroidery you will need water-soluble mesh stabilizer and embroidery threads.
We worked with Signature cotton thread for machine quilting.
Embroidery:
Embroider the design using cotton thread for machine quilting both in the needle and in the bobbin to make the lace very strong and durable. Choose colors to match the fabric of the purse.
You can read about how to embroider this type of lace on the instructions page.
Out of fabric for the top and for the lining cut:
12 1/2" x 20" - body of the purse
9" x 12" - the clutch
Stabilize each piece with the iron-on light-weight interfacing.
Place the lining and top 9" x12" pieces face to face. Pin them together. Using either a print-out of the design or actual stitch-out of the lace, position it on the leather piece as shown. Leave 1/2" upper, left and right margins.

Trace the lace with a marker.

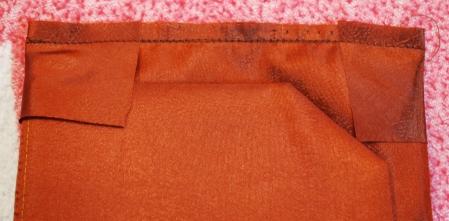
Machine-stitch along the marked line. Cut away the excess fabric, leaving 1/4" of seam allowance. Make notches as shown. Turn the work right side out. Press with warm iron.

Mark the position of the magnetic clasp.

Attach one half on the clasp.

Pin the lace piece to the clutch.

Machine-stitch the lace to the clutch using invisible thread in the needle and thread of the a color that matches the lining in the bobbin.

On your working table, place the 12 1/2" x 20" leather piece face up. Position the clutch, face down, along one of the short sides. Leave an equal distance on the left and on the right. Pin the parts together.
Machine-stitch them together about 1/2" from the edge.

Cover with the lining, face down. Align all edges and pin the parts together along both short sides.
Machine-stitch together along the stitch-line that you made in the previous step. Then, stitch the short sides together with seam allowance about 1/2".

Turn the working piece right side out. Press with a warm iron.
Attach the second half of the clasp.

Fold in half, face inwards. Align the side edges. Pin them together. Topstitch with seam allowance 1/4".

Finish the raw edges of the purse. For this, out of the fabric for the lining cut 2 strips measuring 2" x 12".
Position the first strip along one side as shown. Pin. Topstitch 1/4" from the edge.


Unfold the strip, as shown, and press.

Fold the strip over the seam and press. Tuck the raw edge under the fold. Press again. Pin. Topstitch in place.
Repeat with the other side of the purse.

Stitch box corners at the bottom of the purse. For this separate the front and back sides at the corners. Center the side seams with the bottom line. Measure 1 1/2" along the bottom line from the corner and draw a line perpendicular to the bottom line across the corner. Top-stitch along the line. Do not trim the seam.
Fold the corners to the side seams and hand-stitch to the side seams using a few stitches.

Turn the purse right side out.

