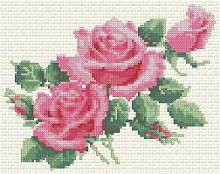
In this tutorial we are going to show you how to fashion this attractive bed cover.
The size of the finished cover is 114" by 78" (284 x 196 cm). You will need fabric of two matching colors.
For this project we used the design set Sunflowers Collection.

Step One: Cut out 14 square pieces of color A and 16 square pieces of color B.
Each square measures 13" x 13" (33 x 33cm), after stitching it should be 12" x 12" (31 x 31cm)
Having embroidered all pieces, assemble them as shown on the diagram and use a sewing machine to stitch them together.

Step Two: Cut out 2 more square pieces of color A; cut them diagonally into 4 triangles (c). Machine stitch triangles (c) to the bed cover according to the diagram.
Step Tree: Cut out 2 square pieces measuring 35" x 35" (89 x 89 cm) each; cut them diagonally into 4 triangles (d). Machine stitch triangles (d) to the bed cover according to the diagram. The cover's top is ready.
Step Four: Prepare the backing (a rectangle measuring 104" x 70" or 264 x 176 cm), spread it evenly on a spacious surface, cover with 1 layer of batting (a rectangle measuring 112" x 76" or 284 x 196 cm) so that 4" (10 cm) of batting projects from each edges; place the cover's embroidered top, right side up, again 4" (10 cm) of batting projects from all edges. Quilt all three layers together.

Step Five: Cut out 9" (22 cm)-wide strips of color B for binding. In length two should measure 79" (198 cm) and two 115" (286 cm). Sew the strips together. Finish out the edges in mitered frame.

You might also like to embroider some matching cushions with these designs.

You can use other designs for this project, e.g. Spring Flower Set; Summer Flowerbed Set; Morning Glory Set; Flowers Set; Trees in Blossom Set, and Roses Set.

 |
 |
 |
 |
 |
 |
 |
 |
 |