For this charming bag we used the embroidery design La Mode (Fashion in French). The quotation reads "Fashion comes and goes, but style is forever."
The finished size of the bag folded is about 12" x 13" folded or 12" x 19" unfolded.

Besides embroidery thread (either polyester or rayon), you will need
Cutting:
Out of faux leather fabric, cut
Emboridery
Stabilize the faux leather fabric with medium-weight iron-on stabilizer. You will need two stitch-outs of the La Mode design.
Hoop the fabric as close to one of the shorter edges as possible. For the first piece of fabric, embroider the design with its straight side to the edge.

For the second piece of fabric, embroider the design with its curved side to the edge.
Do not remove the stabilizer under the embroidery.

Cutting the embroidered pieces:
Cut the piece with the first stitch-out to get a rectangle measuring 13" x 20": leave 1/2" seam allowance past the straight edge of the embroidery, and leave 1 1/2" margins on the sides.
Cut the piece with the second stitch-out to get a rectangle measuring 13" x 20": leave a 3" margin past the curved edge of the embroidery, and leave 1 1/2" margins on the sides.
Stabilize both pieces with iron-on sewing intefacing.
Sewing in the Zipper:
Place the zipper, face up, on the working table. Cover with the first rectangle, face down, with the embroidery close to the zipper.
Baste the piece and zipper together about 1/4" from the zipper teeth. Topstitch along the baste, start and finish 1/2" from the sides. Remove the baste thread.
Fold the fabric back. Press. Topstitch 1/8" along the upper edge.

In the same way sew the second piece to the zipper, with the embroidery on the other side from the zipper:

Stabilize the 1" x 8" strip with sewing interfacing. Fold the strip in half lengthwise and zig-zag the open edge closed. Cut the strip in half.

With the zipper closed, fold the bag in half and align the edges. Pin them together.
Fold the strips in half and insert them between the back and front panels 5 1/2" from the upper edge / zipper. The loop goes inside, and the ends protrude 1/4" beyound the panels. Pin in place.
Check with the ruler that the loops on both sides are the same distance from the upper edge / zipper.

Topstitch the sides together, seam allowance about 1/2".
Turn the working piece right side out. Open the zipper. Then turn the right side in.
Lining
Take the 7" x 15" piece for the pocket. Fold it widthwise, face inside. Stitch the sides. seam allowance 1/4".
Turn the right side out. Tuck in the raw edge about 1/2". Press. Topstitch it closed.
Position the pocket on one of the lining panels, about 4-5" from the lower edge. Pin. Topstitch it in place.
Place the lining panels face to face. Align the edges. Pin them together. Sew the sides. Seam allowance 1/4".
Turn right side out.
Fold the upper edge 1/2" back. Press the folded line.
Put the lining on top of the the bag. Hand-stitch the upper edge of the lining to the zipper.


Fold the lower edge of the lining out of the way and machine-stitch the bottom of the bag. Seam allowance 1/2".
Turn the bag right side out. Pull the lining out. Fold the bottom raw edge 1/2" inside. Topstitch it closed.
Tuck the lining inside.
The Handle:
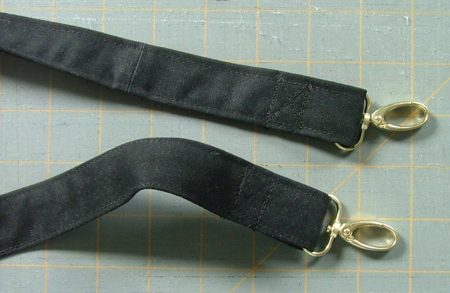
Stabilize the 3" x 37" strip with sewing interfacing. Fold the strip lengthwise 2 times to get a strip 1" wide. Topstitch it several times - 1/4" from the edges, 1/8 from the edges and 1/2" from both edges.
Put the swivel clasps on the ends of the long strap. Fold the ends about 2" to the wrong side and topstitch the ends to the strap.

Attach the swivels to the loops on the bag's sides.
This is the back of the unfolded bag.

The front of the unfolded bag.

Fold the back panel onto the front. Your bag is ready. Enjoy!
