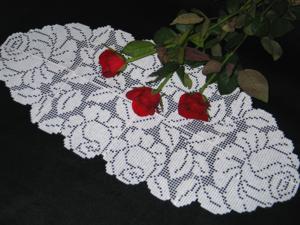
The FSL Crochet Rose Table Runner is a set of machine embroidery designs. The embroidered parts are assembled into the table runner.

Most Importantly: ALWAYS make a test stitch-out of a design. This helps you select the threads, needles, stabilizers and settings of your machine correctly.
The crochet lace is embroidered in accordance with the General Guidelines and Step-by-Step Guide to Embroidering our Crochet-Style FSL designs. Please read the guide, because you might find it helpful.
Some points to remember from the General Guidelines:
Use Vilene water soluble mesh stabilizer;
Use cotton thread and clean your machine after every design;
Use the same thread in the needle and bobbin.
DO NOT embroider several designs in one hoop.
Make sure you use a sharp needle. Embroidery 12/80 size needle is suitable in most cases. However we noticed that cotton threads in special metalic needles, which have a larger eye and a groove to reduce friction of the metallic thread, usually give less lint than with embroidery needles.
Note: The thinner the thread the finer the final product will be. 60- weight cotton gives fine light lace; 40-weight cotton gives heavy lace with the look of hand-made crocheted lace.
Washing out the Stabilizer
Rinsing away the stabilizer is an important step, because the lace can be stretched or distorted if this is done incorrectly. We recommend to use a foam board and stainless pins.
Cut away the excess stabilizer close to the stitches. Take your time and carefully pin every single square on the lace's outer edge to the board.
Now place the board into a bowl with luke-warm water. Leave the board in the water for at least half an hour. Change the water a couple of times.
Take the board out of the water and leave to air dry. Do not unpin the lace until it's completely dry.
Test Stitch-out
Embroider one of the files once. Make sure that there are no problems in the stitch-out. If you're satisfied with the results, you can proceed. If there are problems - missing stitches, loops, etc. you should re-read the General Guidelines and Step-by-Step Guide to Embroidering our Crochet-Style FSL designs and make sure you did everything correctly.
Embroider each of the files in the set once. Rinze the stabilizer as descrubed above. Start to assemble the table runner according to the diagrams below.
On your sewing machine, using zig-zag stitch and the same or thinner thread with which you made the embroidery, stitch together part 1 and part1 mirror.
Then sew together parts 2 and part 2 mirror.
Sew the new pieces together.

stitch together part 3 and part 3 mirror.
Then sew together part 4 and part 4 mirror.
Sew the new pieces together.

Now stitch both new parts together.