Some points to remember from the General Guidelines:
Use Vilene water soluble stabilizer;
Use the same thread for the upper and bobbin to get two-sided embroidery.
DO NOT embroider several designs in one hoop.
These are the instructions on how to assemble the Poinsettia Bowl and Doily Set from our catalog. Along with the embroidery files, you will get the color card, which will help you select the threads, and also sort out the many parts of the design.

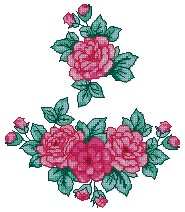
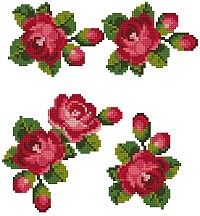
Step One: To make the oval bowl, you'll have to embroider eight bowl panels with poinsettia, two white auxiliary panels, two hexagons and two triangles for the bottom. The bowl panels are in the first row on the picture. The bowl bottom parts are in the second row on the picture.
Use 2 layers of Vilene-type water-soluble stabilizer; use the same thread for both the needle and bobbin to get 2-sided embroidery. The poinsettias are in the cross-stitch technique, and there will be jump stitches. After finishing the embroidery, trim all the jumps.
Rinse the stabilizer and leave to air dry.

Step Two: Press all parts with steam and sew them together with invisible thread. Start with the bowls bottom - zigzag the triangles to one of the hexagons, then zigzag the other hexagon to the triangles.

Now stitch together the panels of the bowl into two strips of four. Take two poinsettia panels and zigzag them together, then zigzag the third one to the second, then the fourth to the third. Do the same with the remaining poinsettia panels. You'll have two strips of panels.
Now take one of the strips and two auxiliary panels. Zigzag the auxilary panel to the first poinsettia panel; zigzag the second auxiliary panel to the last poinsettia panel.
Zigzag one side of the second strips to the auxiliary panel of the first strip. Do not form into a loop yet.
Take the bottom, press with steam and zigzag to the bottom edge of each panel. The auxiliary panels have to be aligned with the triangles, and the bowl panels have to be aligned to the edges of the hexagons.
Then, zigzag the last open seam -- between one of the bowl panels and one of the auxiliary panels -- from the inside.


If you want to get a round bowl, you can embroider six poinsettia panels and the hexagon as a bottom. Follow the embroidery instructions given above. Read instructions on how to assemble this bowl in our Guide to Assembling a Freestanding Bowl.

To make the poinsettia doily, you'll have to embroider all the doily panels shown on the picture. For the doily, you can use white bobbin thread as it doesn't have to be two-sided.
Trim the jump stitches, rinse the stabilizer and leave to air dry. Press with steam and stitch the parts together using invisible thread.

We also have a Poinsettia Linen Set in our Catalog, which can be used to make a beautiful table cloth. The poinsettia bowls compliment it very nicely and together they make a wonderful gift.


We hope that you like our poinsettia set and the many possibilities it offers. Enjoy!
 |
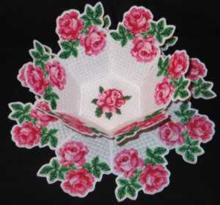
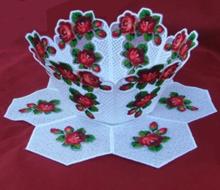
Rose Tapestry Bowl and Doily Set |
 |
|
 |
|
 |
|