
Some points to remember from the General Guidelines:
Use Vilene water soluble stabilizer;
Use the same thread for the upper and bobbin to get two-sided embroidery.
DO NOT embroider several designs in one hoop.
These are the instructions on how to assemble the Our Lady Basket and Doily Set from our catalog. Along with the embroidery files, you will get the color card, which will help you to select the threads, and also sort out the many parts of the design.
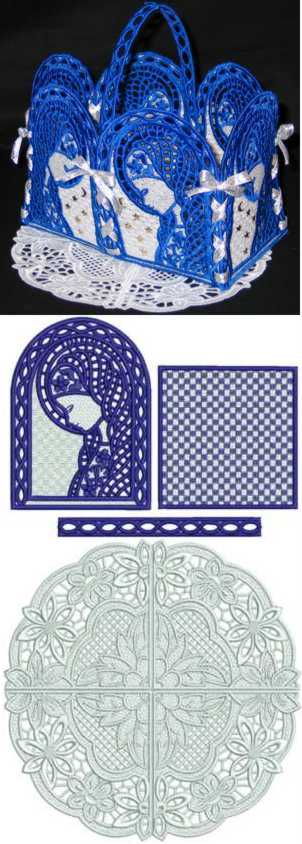
You can make two baskets - the smaller and the larger one - out of the parts of this design. To make the smaller basket, embroider four panels, two handle parts, and the square as a bottom. The basket panel is the one in the upper left corner of the picture. The basket bottom is on the right beside the panel, the handle is under the two parts.

To make the larger basket, you'll have to embroider six basket panels, two handle parts, and two squares for the bottom.

Use 2 layers of Vilene-type water-soluble stabilizer; use the same thread for both the needle and bobbin to get 2-sided embroidery.
After finishing embroidery, rinse the stabilizer and leave to air dry.
Impotant Note: It's very important to use as small a hoop as possible. E.g. if your design is for a small hoop, use the small hoop, not the large one; if your design is for a large hoop, use large, not mega. Do not try to embroider several freestanding lace designs in one hoop. This is because all water-soluble stabilizers stretch, and in a bigger hoop, it's going to stretch more. This can lead to the design falling apart after the stabilizer is dissolved. It's always better to embroider one part at a time.
Assembly of the Smaller Basket:
Step One: Press all parts with steam. Take the bottom and one of the panels. Align the shorter side of the panel with one of the square sides and zigzag them together with invisible thread. Repeat with the next panel.
Step Two: After all four panels are attached to the bottom, fold them and lace the neighboring panels to each other with ribbons
.
Step Three: Zigzag together the handle parts. Hand-stitch the handle to the basket.

Assembly of the Larger Basket:
Step One: Press all parts with steam. Zigzag the two squares together first, to make the bottom.
Step Two: Zigzag together two basket panels to make one of the long sides of the basket.
Step Three: Align the bottom edge of the connected panels with one of the long sides of the bottom; zigzag them together with invisible thread.
Step Four: Repeat steps 2 and 3 for the other side.
Step Five: Attach the remaining two panels to the shorter sides of the bottom.
Step Six: After all panels are attached to the bottom, fold them and lace the corners with ribbons.
Step Seven: Zigzag together the two halves of the handle. Hand-stitch the handle to the basket.

To make the doily, you'll have to embroider four doily panels. For the doily, you can use white bobbin thread as it doesn't have to be two-sided.
Rinse the stabilizer and leave to air dry. Press with steam and stitch the parts together with invisible thread.

Using two basket panels from the design, you can make a small gift bag. Just sew together the bottoms of the two panels and lace the sides together.

We also have an Our Lady cutwork lace desgin in our Catalog, which can be used to make an item out of fabric. We made a small purse.

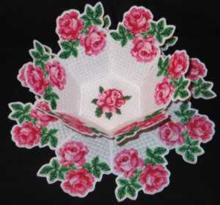 |
Rose Tapestry Bowl and Doily Set |
 |
|
 |
|
 |
|